How to Choose Ultralight Backpacking Gear (Tips & Tricks from a Thru-Hiker)
When I started planning my 2015 Pacific Crest Trail thru-hike, I knew I wanted ultralight backpacking gear. I wasn’t aiming for sub-10 pounds or any particular ‘goal weight’, but I wanted to make intentional gear choices that kept my base weight low without going completely barebones. (Base weight is the total weight of your pack, fully loaded, not including anything you wear, hold or consume, ie. trekking poles, food, fuel, sunscreen etc.) I ended up around 13.5 pounds, including some luxury items I decided were worth the weight.

Some purists might say that to be truly ‘ultralight’ your base weight should be under 10 pounds. In my opinion, ‘ultralight’ is more of a mentality and a style, and anyone willing to debate whether you can be accurately labeled based on an arbitrary number of ounces probably isn’t worth debating. Whether you’re preparing for a thru-hike or just want to lighten your weekend pack, the following tips and gear suggestions will help you shed ounces (and possibly pounds) so you can enjoy the miles and make more of them if you want, and/or ease the burden on your knees. Hike your own hike, as they say.
Before you start looking at new gear, you should assess your current gear setup (unless you’re starting from complete scratch). Do you need a complete overhaul, or just want to make some refinements? The other big question is the size of your gear budget. It’s easy to cut weight if you have thousands of dollars to drop on the newest, most expensive ultralight gear, but if you’re more restricted you’ll have to make some choices and possibly get creative. If you have a hiking partner, particularly one you’re willing to share a tent with, you can get even lighter by sharing heavier pieces of gear like shelter and a stove and fuel. Some may argue that you should each have the gear you need in case you get separated or lose one pack somehow, so decide your own level of comfort with splitting gear.
Step 1: Choose Your Level of (Dis)Comfort
Though this is changing by degrees every year as materials and technology get better, going ultralight has long been a game of giving things up. You give up the ultra-cushy sleeping pad for the short-length accordion foam mat. You give up the ability to simmer fresh food for a tiny stove that only boils water. You give up a tent that can handle weather… Just kidding! But seriously, you do have to make some compromises to go ultralight.
Your gear will not be as luxe as a camp comfort-focused backpacker, but you’ll make more miles more easily and your knees will thank you over time. Though there are pros and cons to both styles, I personally prefer to spend more time on trail and discovering new scenery than spending more time in camp, which makes an ultralight kit my method of choice. However, be smart and tailor your kit to your needs. If you want to go as light as possible but have back problems, take the weight penalty for a cushier sleeping pad. The difference it will make to your experience will likely be worth carrying a few extra ounces.
Most ultralighters bring only one of what they call a ‘luxury item’ if any at all. This may be a pillow, an ultralight camp chair, a nice camera, etc. But limiting yourself to only one or two ‘non-essentials’ helps keep weight down and your kit focused. I always bring my e-reader and a tiny inflatable pillow.
Ultralight gear also tends to be less durable than heavier gear. That’s not to say it can’t handle use, but you will greatly increase the length of its life by treating ultralight gear with a little more care. Clear the pinecones from under the tent floor, don’t sit on your UberLite on the bare ground, etc. Common sense goes a long way.
Step 2: Prioritize the Big 3
The most impactful changes you can make to your kit in terms of shaving weight are with the “Big Three”: Shelter, pack and sleep system. These large, essential items make up the bulk of your base weight, so choosing ultralight options will have an oversized impact on your total.
Keep in mind that though the main goal is decreasing weight, knowing your own methods and your most common hiking environment will help you make gear choices you’ll be happy with over the long term. If you hate ruck-style packs (one giant container with no built-in organization) and will have to add a bunch of smaller stuff sacks that add weight anyway, it might be worth choosing a pack with a few pockets even if it weighs a little more. If you tend to backpack in very rainy places, don’t opt for the teensiest, featherweight option that performs exceptionally well as reviewed by someone who lives in southern Arizona. You will (probably) be much happier with something in which you can wait out a storm.
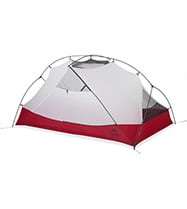
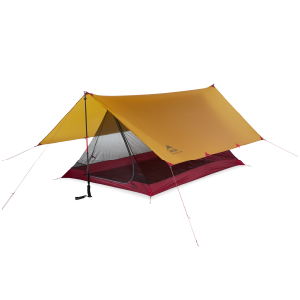
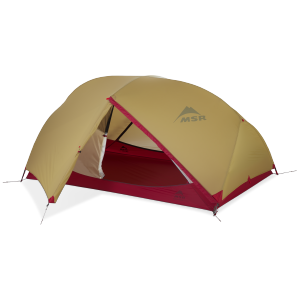
On the PCT I used a non-freestanding tent that set up with my trekking poles, similar to the MSR Thru-Hiker Mesh House and Wing to save on tent pole weight. This worked well for me, but some people may prefer a more convenient but still lightweight semi-freestanding tent like the FreeLite™. Still others like the simplicity of a tarp. Here’s more on how to choose.
For my backpack, I used a Mountain Laurel Designs™ Exodus pack, which is essentially a rucksack with water bottle pockets and an outer pocket. I liked it, but these days I tend to use lightweight packs with a little more built-in organization, like the Osprey Tempest and REI Flash. There are tons of great pack makers out there; read some reviews and if you can, try some on. I also highly recommend getting your back measured at a gear shop so you get the right size.
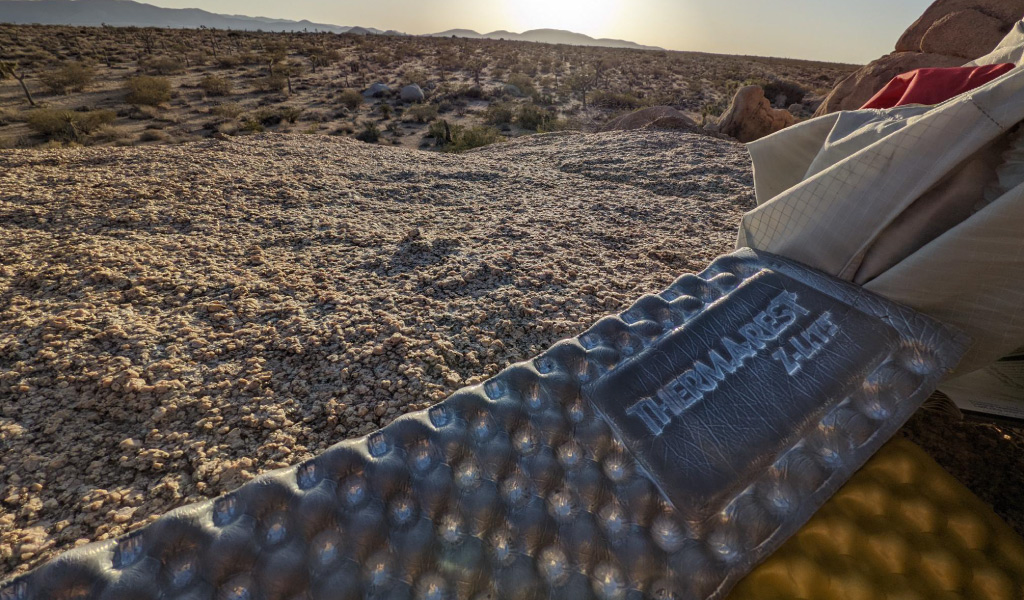
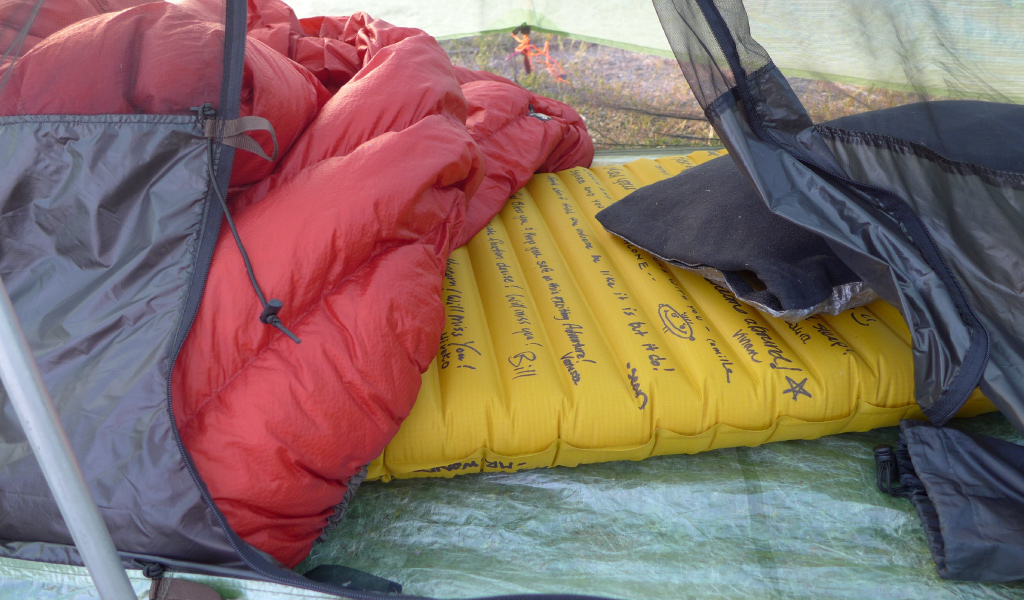
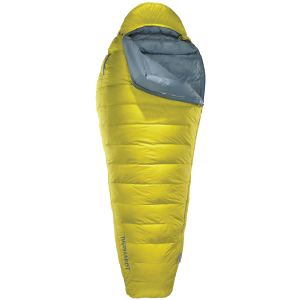
For my sleep system on the PCT, I started with a short-length Therm-a-Rest® NeoAir® sleeping pad and a down quilt that was rated to 20 degrees. I quickly switched to a 10-degree down sleeping bag because I didn’t really know how to use the quilt correctly, and I am a cold sleeper. Quilts are an excellent ultralight option for many backpackers but they have a bit of a learning curve (read more about them here). Two important takeaways: test your gear before long trips, and be willing to adapt and make changes when something isn’t working for you!
Here are three example kits for a comparison (gear and weights accurate as of Feb. 2023):
| Beginner/Comfort Backpacker | Lightweight Backpacker | Ultralight Backpacker | |
|---|---|---|---|
| Shelter | 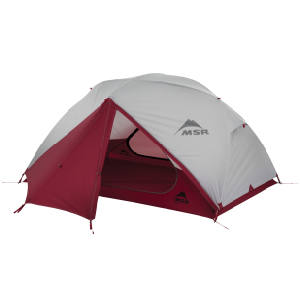
MSR Elixir™ 2 Tent |
 MSR Thru-Hiker 70 Wing MSR Thru-Hiker 70 Wingand Mesh House 2 Min. weight: 1 lb 10 oz |
|
| Sleeping Bag | 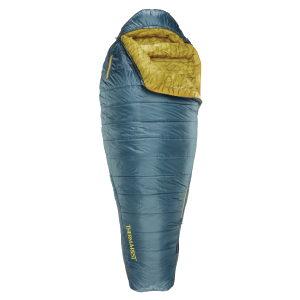 Therm-a-rest Saros™ 20 Therm-a-rest Saros™ 20Synthetic Sleeping Bag Weight: 3 lbs 3 oz |
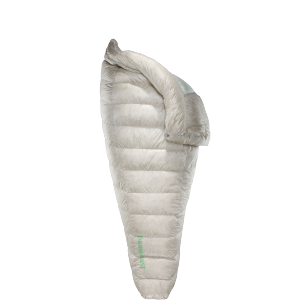
Therm-a-Rest Vesper 20 |
|
| Sleeping Pad | 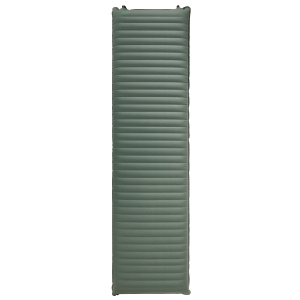 Regular size Therm-a-Rest NeoAir Topo™ Luxe Sleeping Pad Regular size Therm-a-Rest NeoAir Topo™ Luxe Sleeping PadWeight: 1 lb 7 oz |
 Regular size Therm-a-Rest NeoAir XLite™ NXT Sleeping Pad Regular size Therm-a-Rest NeoAir XLite™ NXT Sleeping PadWeight: 12.5 oz |
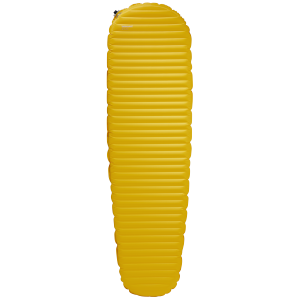
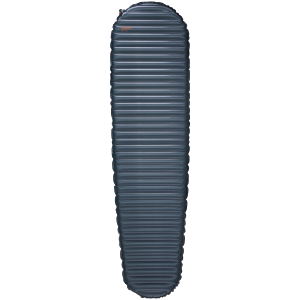 Short-length Therm-a-Rest UberLite™ Sleeping Pad Short-length Therm-a-Rest UberLite™ Sleeping PadWeight: 6 oz |
| Pack | Gregory Baltoro™ 65/Deva™ 60 Weight: 4 lbs 13 oz |
Osprey Exos™ 58/Eja™ 58 Weight: 2 lbs 14 oz |
Pack: Atom™ Packs The Atom+ 50 Weight: 1 lb 8 oz |
| Total Weight | 14 lbs 7 oz | 8 lbs 4.5 oz | 4 lbs 11 oz |
As you can see, these gear choices massively impact base weight. However, weight is not the only factor to keep in mind. If you choose gear that is lower in volume as well as weight, you can choose a lower-volume backpack, which will inherently weigh less. For example, down sleeping bags compress more than synthetic ones, and shelters that use trekking poles to set up pack much smaller than tents with poles. I use a 30-liter pack for up to three nights out which always blows people’s minds on trail, and it’s all because the gear I’ve chosen is minimal in both weight and volume.
And don’t forget the little things. Swapping out standard tent stakes for lighter ones is an easy way to lighten up a bit. I love the MSR Mini Groundhog stakes, but the CarbonCore stakes are the lightest. Here’s more on how to choose tent stakes.
Unfortunately, the Big 3 will often impact your budget as much as your base weight. There are many gearheads out there who buy the latest and greatest as soon as it comes out to replace last year’s model. Search used gear sites and secondhand stores for deals on gear that still has tons of life left at a fraction of the original cost. Fabrics and materials have become so advanced that often the newest model of something only shaves off an ounce or two because the weight was already low, meaning options from the last two to three years are still excellent choices.

Step 3: Make Intentional Choices
With gear, as in life, intention matters. Once you’ve nailed down the Big 3, you can consider the rest of your kit with your ultralight goal in mind. Though these things might seem small and inconsequential in terms of weight, don’t forget that grams add up to ounces which add up to pounds.
Gear needs to earn a place in your pack. When possible, only choose items that serve more than one purpose. For example, these utensils are also tools, and the sides of the handles are also perfect for scraping the inside of a pot clean. This stuff sack has a soft lining so you can turn it inside out, stuff it with clothes and use it as a pillow. Hiking poles become tent poles with certain shelter types.
Get a gram-accurate scale and weigh your gear, then record your kit somewhere, be it an Excel sheet or a website like LighterPack.com. That’s what I used when planning my PCT gear, and I loved the ability to mark certain items ‘Worn’ so they don’t count towards your base weight. You can also build different kits with the same gear, so I can see my PCT kit, my Weekend kit, a Winter kit, etc. It’s perfect to pull up as a packing list, and also shows you how fast the weight of all the little items adds up.
Cooking
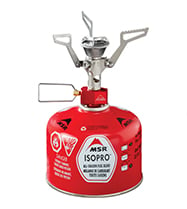
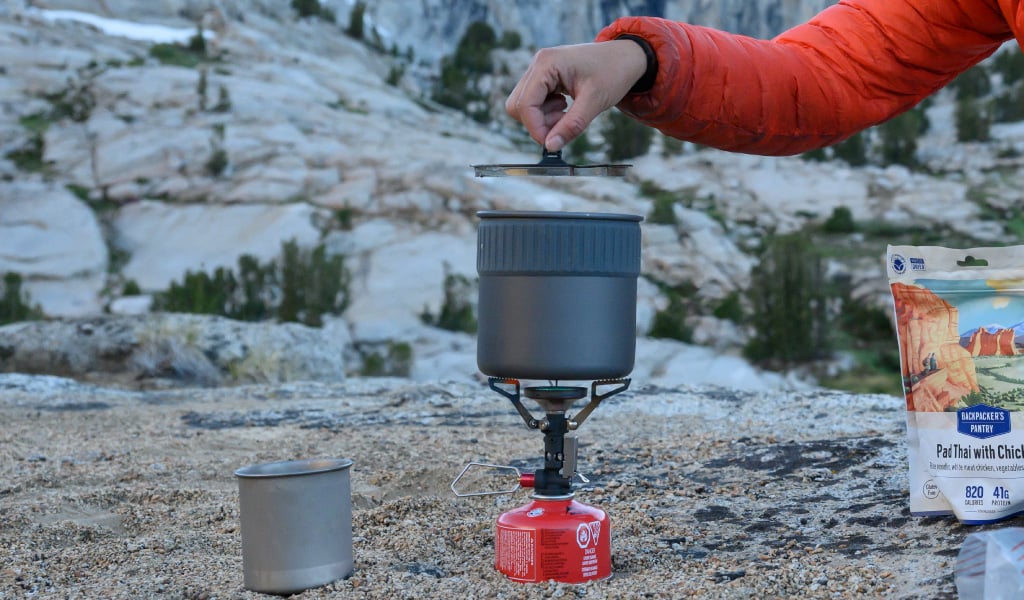
Stove choice can be very personal. Some simply want to boil water as quickly as possible to pour into their dehydrated meal bag. Others make fresh meals, the thought being that less weight elsewhere means you can carry heavier food. Others, generally thru-hikers, go completely stoveless and only eat food that is ready to eat or can be cold-soaked. On the PCT I used an alcohol stove (check fire regulations), which was incredibly light but also quite slow. If speed is no concern but budget is, alcohol stoves are cheap to fuel and simple to make at home for minimal cost (check out this tutorial for a penny-style alcohol stove from my friend Brayden at REI).
These days I prefer an ultralight canister stove that leans toward the ‘boil water’ side of things, with the option to make easy-cook meals like pasta: the 2.9-ounce MSR PocketRocket® Deluxe. Its small size is deceiving; this little stove is a powerhouse and boils one liter of water in 3.3 minutes. I’ve never been overly concerned with boil time (I’m sitting in camp anyway, might as well set up my tent and blow up my pad while my water boils), but it is nice to have a hot drink quickly when I want one.
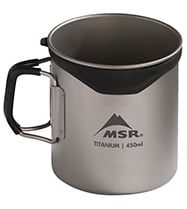
I often eat freeze-dried or home-dehydrated meals from a freezer bag, so a long spoon is the perfect utensil for me—you don’t need more than one. My pot (titanium is the lightest choice) is usually also my cup since I’m just boiling water, but if I want to make something like mac and cheese that actually uses my pot as a bowl, I’ll bring an ultralight cup like this to drink tea or hot chocolate.
Clothes
If there’s one big difference I see between ultralighters and beginner backpackers, it’s the amount of clothes they pack. I’ll say this once: you don’t need more than ONE hiking outfit (underwear and socks are the only exceptions). You’re going to stink—embrace it (also leave the deodorant at home). You should have three ‘groups’ of clothes:
- On-body outfit worn while hiking, plus an extra pair of underwear and socks
- Essential layers to add based on weather conditions
- Sleeping clothes, worn only while in camp
On the PCT, my on-body hiking outfit consisted of the following: tech tee (no cotton!), sports bra, hiking skirt, Dirty Girl gaiters (if you know you know), a sun hat, Injinji toe socks (great at minimizing blisters) and Altra Lone Peak trail running shoes. My sleep clothes included: a wool base layer top and pants, and thick wool socks.
Side note: Trail running shoes seem to have expanded in popularity beyond the thru-hiking community these days, so people are figuring out that they’re way more comfortable and breathable (aka fewer blisters). One of the benefits of lightening your pack—you can lighten your footwear. You don’t need heavy-duty, leather-clad ankle support if you’re not carrying 80 pounds on your back.
The key to both being comfortable and packing light is layering. Assess the environment and weather conditions you expect on your trip and choose layers accordingly. In the southern desert section, my layers included: a sun hoodie, a wind shirt, an ultralight rain jacket, a down puffy, wind pants, a fleece beanie and a lightweight neck gaiter. Once I hit the elevation and snow of the Sierra range, I added a fleece quarter-zip top and gloves. In rainy Washington, I swapped my ultralight rain jacket for a more heavy-duty one and added hiking tights to wear under my skirt for the chilly fall days.
Water
There are three general ultralight methods for dealing with drinking water on the trail. The first and fortunately least common method is an example of what is often referred to as ‘stupid-light’ (aka putting yourself at risk by not bringing essential items or making choices for the sake of cutting as much weight as possible). These folks try to choose water sources that appear clean and don’t filter anything. Don’t do that. That’s how you get giardia. (Why even mention it? Because this ‘method’ tends to be loudly evangelized in ultralight forums. If it sounds too good to be true…)
The second option is to chemically treat water with drops called AquaTabs®. Pro: This is the lightest safe option. Con: you have to wait 30 minutes for the chemicals to do their work, and they don’t remove any visible ‘floaties’ or dirt in the water. Many people who use drops strain particularly dirty water through a bandana secured tightly over a water bottle.
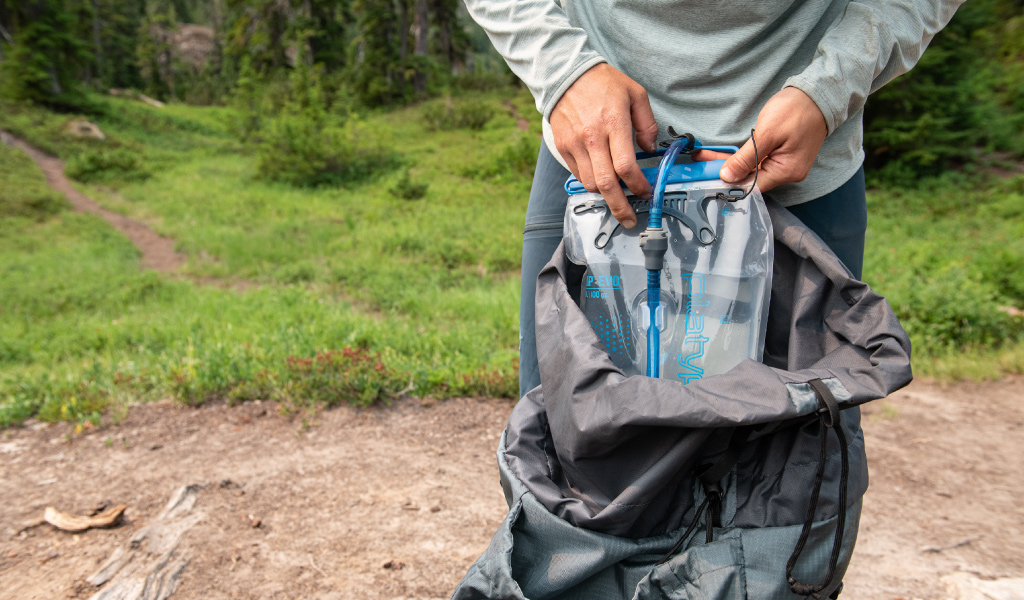
The third, most common option is to carry a lightweight squeeze-style filter which removes bacteria, protozoa and particulates. The MSR TrailShot™ filters one liter of water in 60 seconds. I pair my filter with a Platypus Big Zip™ reservoir and multiple one-liter SmartWater® bottles for clean water (the thru-hiker bottle of choice for its weight, slim profile and durability).
First Aid & Hygiene
I highly encourage anyone who plans to spend a decent amount of time outside to take a backcountry wilderness first aid class—it’s absolutely worth it. Those classes will teach you many things, but two of the most important are: (1) there’s not a whole lot you can really do out there if someone is seriously injured or sick; (2) having an emergency satellite device is essential for getting timely help. A PLB or satellite communicator like the Garmin InReach Mini 2, while pricey, is worth its weight and I would even say mandatory if you go out solo.
People pack their fears. If you’re afraid of being cold, you’ll pack too many layers. If you’re afraid of being hungry, you’ll pack too much food. And for many people, that fear translates strongly to their first aid kit. There are many good resources on this topic if you want to dive into it, but here’s my refined-over-the-years ultralight kit:
- Pain killers
- Antihistamines
- Tums
- Band-aids
- Fabric-style athletic tape (Moleskin is worthless in my opinion)
- Alcohol wipes
- Eye drops
- Hydration salts
- Duct tape (the 11th essential)
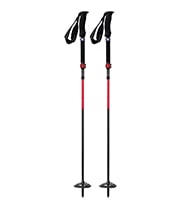
If something extreme happens, like a broken bone, you can make a splint from a trekking or tent pole. You can stabilize various body parts with foam or partially inflated sleeping pads. Extra clothes can be used to make cloth ties. If something dire does happen, your best bet for survival is to stabilize, keep warm and hydrated, and use a beacon to call for help.
In terms of trail hygiene, you’re going to smell so don’t worry about it. Bring hand sanitizer so you don’t make yourself (or anyone else) sick after going to the bathroom. Soap is questionable at best; for short trips, I leave it at home—even ‘biodegradable’ soap isn’t great for the environment. I don’t need to wash myself during a weekend trip beyond wiping down with a wet bandana, and if I’m just boiling water my pot stays clean anyway. For the occasional cooked meal, I scrape the sides of my pot with my long spoon and clean it as best I can. Leave wipes and deodorant in your car, along with a change of clothes, for a quick hiker bath before hitting the diner for your post-hike burger. For the record, I didn’t cut my toothbrush in half; I bought a mini travel one that comes with its own case! A travel-size toothpaste and sunscreen and I’m set.
A note for people who squat to pee: Do yourself a favor and get a Kula cloth. They’re amazing; no need to use toilet paper to pee anymore. I also highly recommend switching from tampons to a menstrual cup. If you do use disposable menstrual items, always always always pack it all out. Plastic is forever.
A small kit with needle and thread, super glue, patch kit, mini lighter and safety pins is incredibly useful as well. Gear repair, blister relief and laundry hangers all in one tiny pouch.
Food Matters
Even though it’s not technically part of your base weight, you still have to carry food on your back. Thus, giving it some consideration is an important part of the ultralight philosophy. The general recommendation for backpackers is to carry 2-2.5 pounds of food a day. If you’re bringing more than that, it’s probably too much, though carrying an extra half day’s rations for an emergency isn’t a terrible idea. The important thing to keep in mind is to choose calorically dense food, aiming for a ratio of at least 100 calories per ounce. This is more important for thru-hikers who have to carry anywhere from four to eight days’ worth of food at a time, but if you’re trying to cut down pack weight every little bit helps.
Lots of food comes in extra packaging. Take the time to repackage in resealable plastic or more environmentally friendly silicon bags (yes, I know they’re heavier but they’re lighter on the planet). Then once you’re done, you have a bag you can reuse on another trip, or use as a garbage bag. One thing ultralighters NEVER do is leave trash in the wilderness. Pack it in, pack it out. (That goes for toilet paper too.)
Ultralight Backpacking Gear Checklist
Here it is, all in one place. Print this off and laminate it so you can use it over and over, or use it as a template to fill out your own spreadsheet or LighterPack list.
Big 3
- Backpack
- Tent/shelter
- Ultralight tent stakes
- Sleep System
- Sleeping bag/quilt
- Sleeping pad
Camp Kitchen
- Stove
- Pot
- Fuel
- Utensil
- Cup, optional
Clothes
- Hiking shirt
- Hiking bottoms
- Sports bra
- Underwear, two pairs
- Hiking socks, two pairs
- Brim hat
- Sunglasses
- Gaiters, optional
- Shoes
- Sleep shirt
- Sleep pants
- Sleep socks
- Beanie hat
- Layers, as needed
- Puffy jacket
- Fleece top
- Wind shirt
- Rain jacket
- Wind/rain pants
- Warm hiking tights
- Gloves
Water
- Filter and/or drops
- Dirty water bottle
- Clean water bottle
- Reservoir, optional
First Aid/Hygiene
- First aid kit
- Ultralight trowel
- Travel hand sanitizer
- Toilet paper and pack-out bag
- Toothbrush and toothpaste
- Sunscreen
- Bug spray, optional
- Chapstick
- Multipurpose repair kit
- Menstrual needs
Other Essentials
- Satellite communicator/PLB
- Paper map (yes, I always carry one)
- Compass (ditto)
- Headlamp
- Small multitool
- Bear can if required, check regulations in your area
- Bandana
Luxury Items (Optional, choose 1-2)
- E-reader/book
- Camera
- Pillow
- Ultralight chair
- Fishing pole
Related Posts:
- What to Send in Thru-Hiking Care Packages
- How Much Does an Appalachian Trail Thru-hike Cost?
- Tips for Thru-Hikers: Hiking the PCT & CDT in the Snow
 Ashley Brown