Snow Camping Pro Tips
It’s critical to know how to layer properly, use your snow safety gear and navigate terrain during winter backcountry trips. But just as important is knowing how to proficiently camp in the snow. After all, the more you have your snow-camping system figured out, the more enjoyable—and productive—your adventures will be. This quick list of pro tips will make camping during the harshest season of the year easier, so you can stay out longer.
CAMPSITE

First and foremost, avoid avalanche terrain. Remember, avalanche terrain has three parts: The start zone, path and runout. Be aware of what’s above you and what the consequences would be if a slide were to occur.
Camp where it’ll be warmest: Cold air flows downward, settling in low regions; so benches and outcroppings above valley floors will be warmer. Morning sun is helpful, because it’s coldest just before dawn. And south-facing areas offer more light for longer days.
Check the trees: Dead branches and those heavily burdened with snow can release, causing injury or harm.
Take shelter from the wind. Trees, boulders, or a tarp hung between trees all make great wind buffers.
Look for landmarks: Unique natural features can be critical to later locating your camp in a storm.
Camp near running water if you can. Melting snow is fuel intensive, using up to three times the amount required during a summer trip.
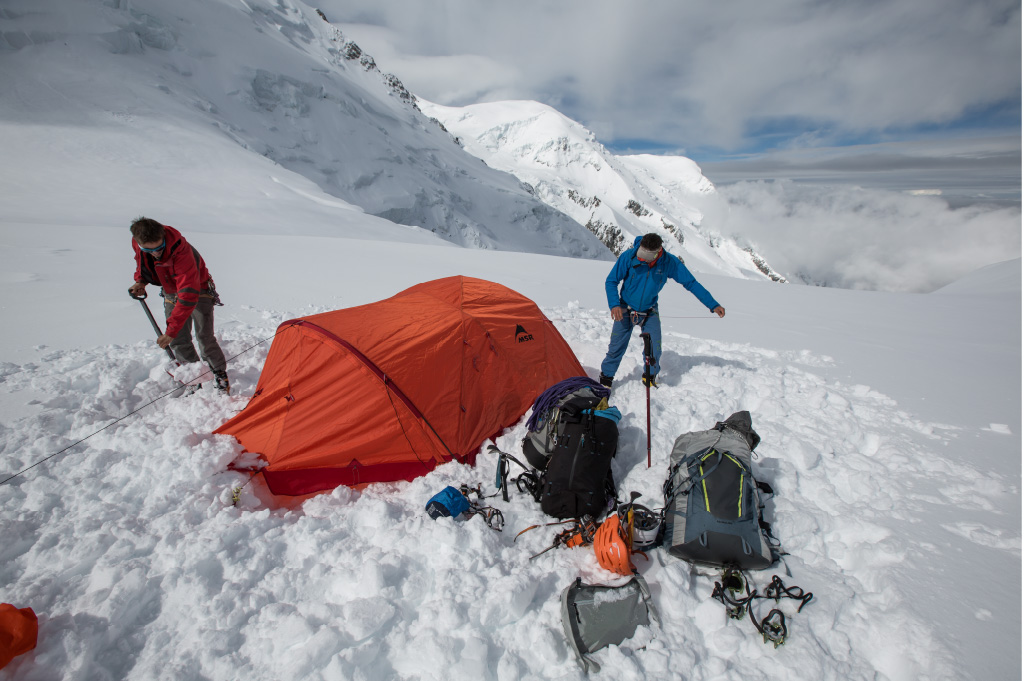
When you find your site, stomp out a platform in the snow. With your equipment on, stomp down zones for your tent and communal areas. Then let the snow set for 30 minutes to refreeze and harden to make walking around easier.
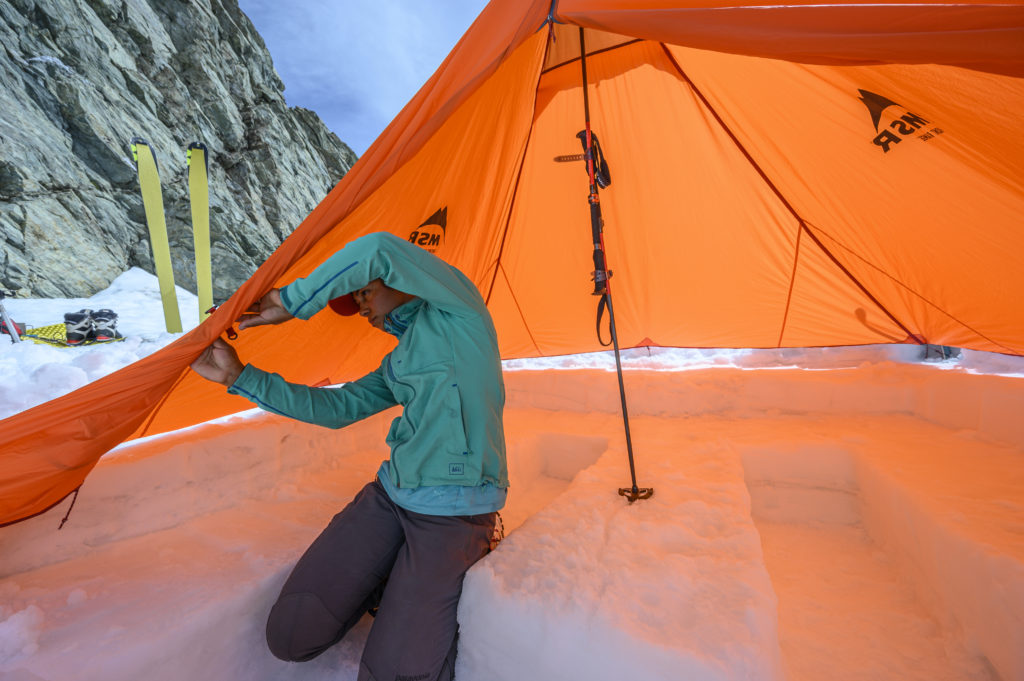
At higher elevations, dig down a foot or two for your tent. This will provide added wind protection against the stronger gusts of the alpine.
Or, build a wind wall: Cut bricks out of consolidated snow and stack them at least three feet high and a couple feet past the tent on both sides for extra protection against blowing snow.
TENT SETUP
For starters, bring the right tent: This may be as simple as your durable three-season tent depending on the conditions. However, if you anticipate heavy snow or high winds, choose a four-season or mountaineering tent. It may be good to brush up on the benefits of single-wall vs. double-wall tents.
Place the tent ninety degrees to the wind. This prevents snow from being blown inside your home or from piling up against the door.
Face your entrance downhill: If your tent faces uphill, cold air, which flows downward, can enter it.
Anchor your tent securely: In loose snow, stakes may not work. MSR’s Blizzard tent stakes are designed for consolidated snow, and can be used as deadman anchors in loose snow. Deadman anchors can also be made of rocks, sticks or gallon-sized plastic baggies filled with snow. To set them, add cord to each of your tent’s stake-out points. Then wrap the line around your chosen anchor (don’t tie a knot, as it can freeze). Bury the anchor 10-12 inches deep. Then pile snow on top and pack it down. The snow will freeze and hold.
Pack snow around the bottom of the tent. Snow is a great insulator, and it can add stability in windy conditions.
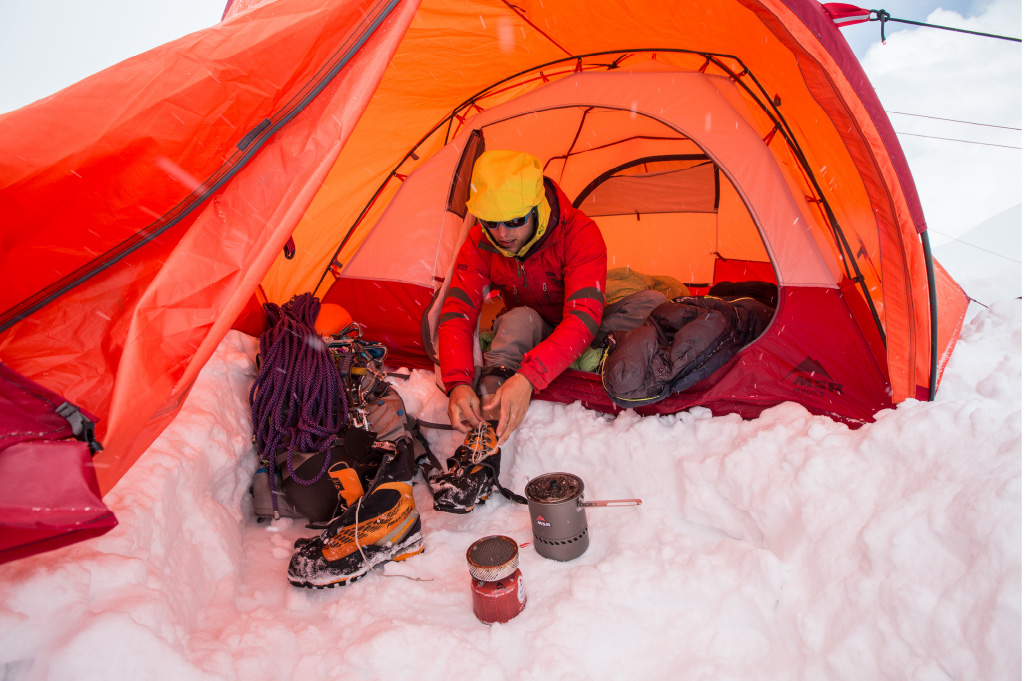
Dig out the space within your vestibules. Digging about a foot down in both vestibules will make it easier to put boots on, cook, and store gear.
Consider using a ground sheet. Moving in your tent can heat up the snow underneath. When that snow refreezes, it can feature sharp, ripping points.
Keep as much snow as possible out of the tent. Thoroughly brush clothes and boots off. Keep as much snow and moisture out of the tent as possible to reduce condensation and refreezing.
Do not cook in your tent. Stoves give off potentially deadly carbon monoxide, which is odorless. In addition, water vapor from cooking can add to condensation buildup inside your tent.
KITCHEN
Build your ultimate dining hall outside: Here you can get creative. One tried and true design is the rectangular pit: Dig a hole in the snow that’s 6’ long X 5’ deep X 4’ wide. Leave snow in the middle for a 3’ long X 3’ high X 2’ wide counter top, and snow along the inside walls for 2’ high benches.
Then carve and shape other kitchen features to meet your needs, such as a dedicated stove platform. Line the benches with Therm-a-Rest Z Lite Sol mattresses for warmth and comfort. Throw an A-frame tarp over it all for weatherproof dining.
STOVES/FUEL/EATING
White gas stoves are best for winter. MSR’s XGK-EX extreme-condition stove is perhaps the world’s most trusted mountaineering stove. In general, liquid-fuel stoves work better in cold weather than canister stoves. This is because canisters lose pressure in cold temps. However, the Reactor and WindBurner stove systems are pressure regulated, allowing them to perform far better than conventional canister stoves in these conditions.
If using a canister stove, go with isobutane fuel, and keep canisters warm in your sleeping bag or jacket prior to use.
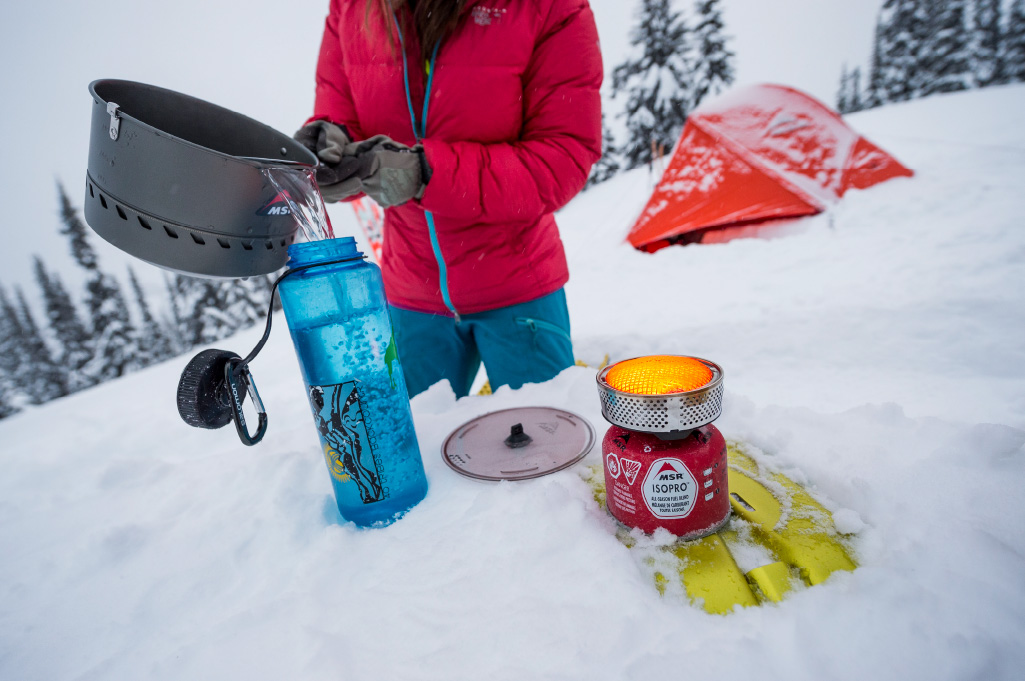
Keep fuel off the snow. The blade of your shovel or an extra pot make a great platform for this.
Eat, even if you’re not hungry. Your appetite drops during cold activities, but you require more calories. Pack meals that are appealing so that you’re more likely to eat—and thus stay warm.
Add butter or coconut oil to your meals: This is an easy way to boost calories to fuel your body’s natural furnace.
Use snow to clean dishes: A good scrubbing with snow will clean pots and pans of food particles. Eat the particles, drink them or pack them out.
WATER
Drink often: Just like your appetite, your body won’t always tell you when it’s thirsty. Dry winter air can dehydrate you faster, which can make you colder and lead to fatigue and hypothermia. Dry mouth, dizziness, cramping, confusion, and increased heart rate can be indicators of dehydration.
Carry coffee filters to strain particles from melted snow. You don’t want to drink dirt and debris.
Build a solar water collector. Find a spot that gets a lot of sun. Dig a valley in the snow about 2 feet across and 1 foot deep. Line it with a black trash bag and pack clean snow around the edges. The sun will melt the snow, creating your backcountry well.
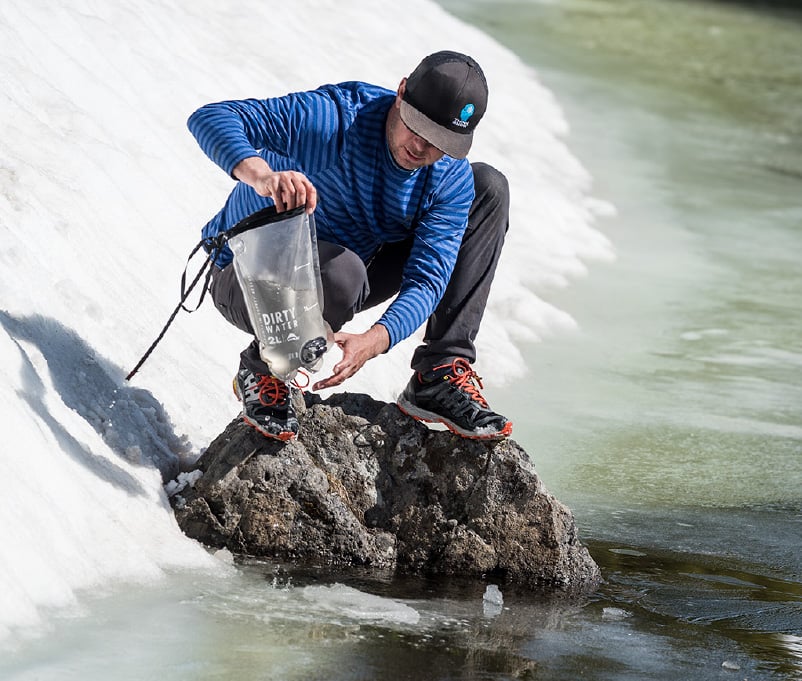
Or, collect running water: Tie a rope around your Drom Bag or water bottle to safely reach the water from a distance. Snowy banks of streams can act as unstable cornices.
Treat collected water: Water from streams and lakes may harbor microbiological contaminants that can make you sick.
- Boiling is the most reliable treatment method in freezing environments. Boil water for at least 1 minute, or 3 minutes above 2000 m.
- Filters can be damaged by freezing. The exception is MSR’s new Guardian purifier, though it must be fully thawed before use.
- Chemical treatments take longer in the cold. Preheat the water to 60° Fahrenheit.
Insulate your water bottles: A piece of old foam sleeping mattress works great. Or, store your bottle upside. Water freezes from the top down; this way, you’ll have liquid water when it’s time to drink.
Drink on the go: With MSR’s Trailshot you can drink water directly from the sources around you, giving you access to clean water all day without the extra weight.

Mix your water: Sports drinks or lemonade added to your water will cause it to freeze at a lower temperature.
SLEEPING
During the day, air out your sleeping bag. Reduce any moisture inside it, which can later freeze.
Vent your tent as much as possible. It’s important to avoid tent condensation buildup, which collects inside your tent as your warm body gives off vapor at night.
Eat protein or fat before bed: Slowly burning calories will help keep you warmer while you sleep.
Exercise before bed: Jumping jacks are a good way to jumpstart your body’s metabolism before tucking in.
Keep gear warm inside your bag: Put your boots in a stuff sack and place them inside the foot of your bag. Add socks, the next day’s clothes, and electronics—anything you don’t want to freeze.
Go. Don’t hold it. Your body burns calories keeping a full bladder warm. Holding it will only make you colder.
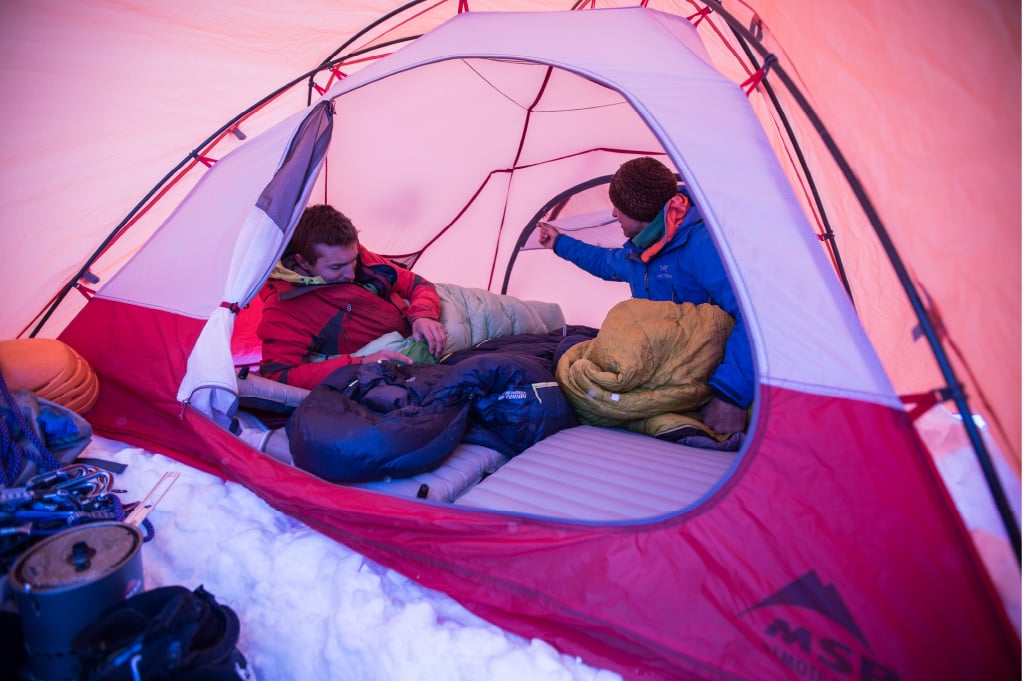
Two mattresses are better than one. Use a closed-cell foam mattress for insulation from the cold ground; then add the NeoAir X-Therm heat-reflecting mattress on top for extra warmth and comfort.
Sleep with balaclava & don’t breathe in your bag: Trap in the heat lost through your head, and avoid adding moisture into your sleeping bag.
Use hand warmers to warm up your sleeping bag. Why not? Everything helps.
WASTE
In the winter, you must pack it out. Catholes don’t count in the snow. Once the snow melts your waste will be exposed. Always bring sanitary baggies for your waste. Also, snow makes a great substitute for TP!
Originally Published February 19, 2018