MSR Employees’ Favorite Camp Recipes
Camp meals vary wildly from person to person. Some are ultralight backpackers who eat cold instant refried beans every night without complaint (not joking). Others, whether car camping or out in the backcountry, want the whole shebang, from a starter salad to a glass of wine and dessert. These five recipes from MSR employees lie mostly in the middle (though some definitely lean toward the backcountry feast side of the scale). We’re a pretty outdoorsy bunch here at MSR, and we’ve perfected our camp recipes over years of adventures.
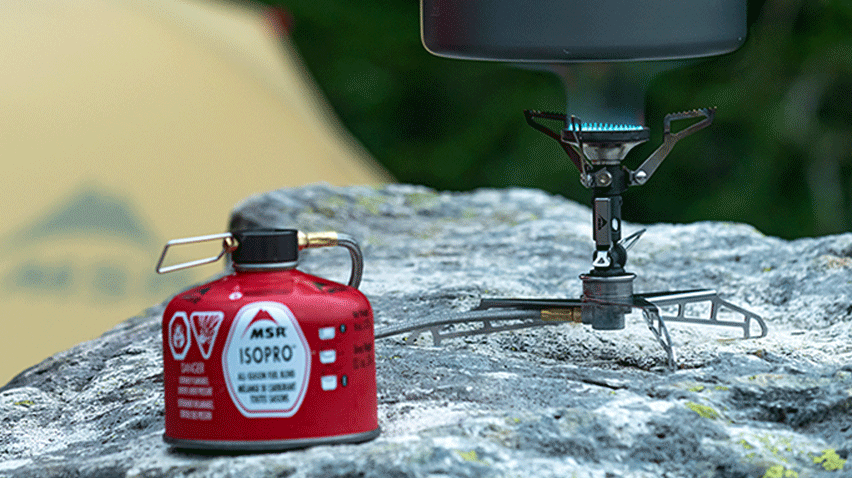
MSR also makes pretty spectacular backpacking and camp stoves, if we do say so ourselves, and each employee has a favorite for cooking up their camp recipes. Check out this deep dive into our stoves, from Polar explorer Eric Larsen.
A couple of pro tips to improve any camp cooking:
- Take a spice shaker with salt, pepper, garlic powder and/or your favorite seasoning
- Have your camp kitchen dialed; it makes the cooking so much easier
- Know how to easily and responsibly wash up (Leave No Trace please!)
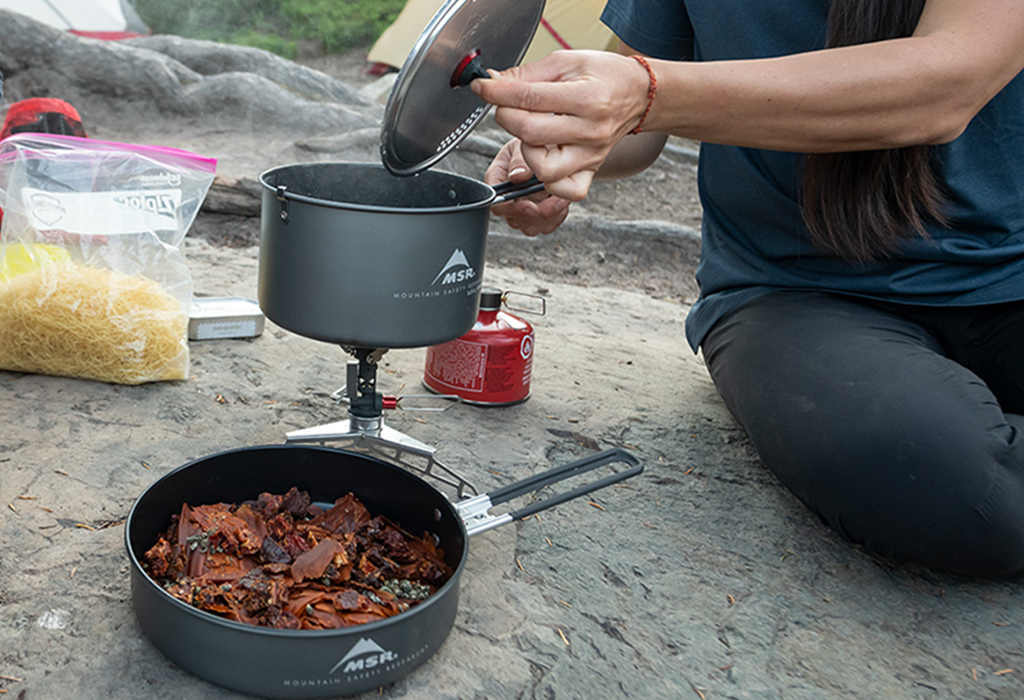
Smoked Salmon & Pesto Pasta
Lance Hammer – Senior Marketing Manager
“My one-pot-delicious-pesto-pasta is my go-to for car camping! So easy and minimal clean up required. It’s particularly satisfying after a day of chilly surfing on the Washington coast. All ingredients are to taste, just scale up for more servings.”
Servings: Variable
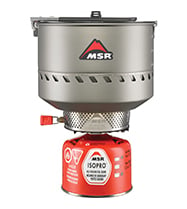
Favorite Stove: MSR WindBurner Group System with the WindBurner Stock Pot
Ingredients:
- Pasta (I go with bowtie)
- Smoked salmon
- Pesto sauce
- Sundried tomatoes
- Side: Baguette + butter + garlic powder
Directions:
- Cook pasta according to package directions.
- Drain water, reserving a little pasta water if you like to add to the sauce.
- Dump in pesto, smoked salmon, and sundried tomatoes. Add pasta water to taste for preferred sauciness.
- Stir it up and serve with the baguette!
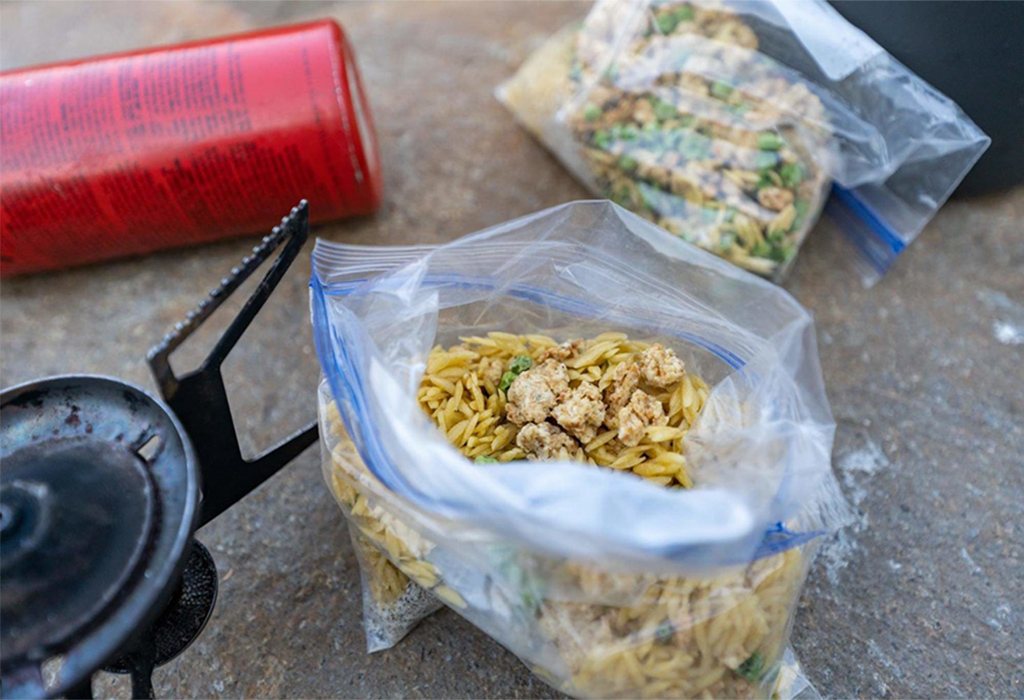
Chicken Piccata
Audrey Burgard – Marketing Manager
“One of my favorite summer car camping or group river trip meals to make is chicken piccata meatballs over orzo and peas. It’s a tangy recipe that hits the spot when you’re wanting something with a fresh flavor. This is a recipe for folks with a dehydrator, but can probably be closely copied by buying the dried ingredients from bulk suppliers.”
Servings: 1; make as many bags as your group size requires!
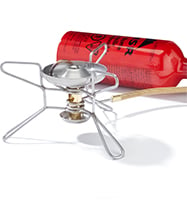
Favorite Stove: MSR WhisperLite
Ingredients:
- 1 cup dehydrated orzo (Cooked and dehydrated at 135F for 6-8 hours)
- ½ cup dehydrated seasoned ground chicken (separate recipe; see below)
- 3 tsp dehydrated capers (dehydrated at 125F for 5-7 hours)
- ¼ cup dehydrated peas (frozen peas dehydrated at 125F for 5-7 hours)
- 1 tsp True Lemon powder (or 4 x 0.8g packets)
- 1 tbsp butter (sub 1.5 tsp olive oil if needed)
- 1/4 tsp salt (or to taste)
- 1/4 tsp pepper (or to taste)
- 1 bouillon cube
Directions
At Home Prep: Add all ingredients to a bag (except the butter, which should go in a separate container).
In Camp:
- To minimize fuel use, I like to dump the dry ingredients into the pot with cold water (just enough to fully cover the dry ingredients) an hour or two before I want to eat.
- When it’s dinner time, I’ll light up the WhisperLite and simmer for 10+ minutes (or until the peas and chicken are fully rehydrated), adding water as needed so it doesn’t burn to the pot. Alternatively, you can add boiling water to the meal in an insulated container and let that sit for 20-30 min, but since I like to eat it hot, I typically boil in the pot.
- Once it’s ready, stir in the butter and enjoy!
Dehydrated Seasoned Ground Chicken
Makes 2 cups, enough for 4 servings of Chicken Piccata
Ingredients:
- 1 lb. lean ground chicken
- ½ cup breadcrumbs
- ½ tsp pepper
- 1/4 tsp salt
- 1/4 tsp oregano
- 1/4 tsp garlic powder
- 4 True Lemon packets (or juice from ½ a lemon)
Directions
- In a bowl, combine all ingredients, making sure to mix in the breadcrumbs evenly.
- Cook over medium heat in a skillet, being careful to not let it burn to the skillet. Since fat does not dehydrate and can lead to dehydrated meat going rancid faster, try to avoid adding oil to the pan if possible. Cook the chicken fully, making sure to break up any larger pieces.
- After chicken is fully cooked through (no pink remaining), dehydrate at 145 for 8-10 hours, or until it has fully hardened (break open a few pieces to make sure).
- Store in a sealed container in the freezer to prolong the shelf life.

Night 1 Kitchen Sink Tortellini
Fletcher Andrews – Sales Manager
“This is my first night meal cause it’s yummy, filling, easy to prep and prepare in camp and includes fresh ingredients that will keep for a day in the pack. I like to bring some red wine in a Platy Preserve and a store-bought package of a premixed salad complete with dressing to round it out. It’s a super easy, fast, and tasty meal for night one.
Depends on the time of year and type of trip but it is equally doable when backpacking, kayaking, overlanding, etc. since the recipe utilizes the efficiency of these systems to cook with limited fuel and while the stove is mostly off.”
Servings: Quantity of raw ingredients depends on the group size, but I’ve made this meal for up to 4 people with a WindBurner Duo or Reactor 1.7 or 2.5-liter system.
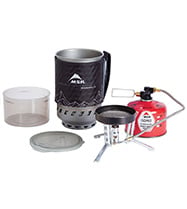
Favorite Stove: MSR WindBurner Duo or Reactor
Ingredients:
- Stuffed tortellini (preferred) or fresh pasta
- Doubled ziplock bags with favorite pasta sauce or pesto
- Fresh veggies, cook’s choice but I often bring chopped onion, peppers, mushrooms, zucchini and capers or substitute with frozen peas or frozen mixed veggies; they thaw throughout the day while hiking (double bag to prevent leakage)
- Dried basil
Directions:
- Heat about a ½ pot of water and as it warms add the tortellini. As soon as it starts to boil shut off the stove and keep the lid on for a few minutes. The radiant heat and efficient pot will continue cooking without fuel.
- Add veggies then restart the stove. As soon as the water boils again, turn it off and let sit a couple more minutes—depending on the veggies used you might want to add them in the first boiling step for extra cooking.
- Test the pasta and veggies to see if they’re cooked through and warm enough—note you’ve used very little fuel at this point. Drain the water away from camp into a pre-dug 6” cathole.
- Immediately add pasta sauce and fire up the stove again, stirring constantly for 20–30 seconds. Let sit a minute with the lid on and serve.
- Clean up by soaking pot for a while, heating briefly and scrubbing with an MSR Alpine Dish Brush, and biodegradable soap dumping wash water in the sump hole (make sure it’s at least 200 feet from any water source). Cover hole.

Camp Miso Soba Noodle Soup with Crispy Tofu
Casey Wagner – ECommerce Merchandising Manager
“This recipe comforts and serves 2-3 ravenous and hungry hikers, trail runners or mountain bikers. While this meal can easily be made in the backcountry, it’s much easier to prep and dispose of the waste when camping with a car, van or trailer. To make this recipe feasible for backpacking, use dehydrated ingredients and pre-cooked tofu (rehydrate the tofu prior to step 4). This is a great recipe to use with the handy-dandy MSR WindBurner Combo (we almost always backpack or camp with some combination of cookware from the WindBurner family). Toss with your favorite camp hot sauce.”
Servings: 2-3
Favorite Stove: MSR WindBurner Combo System
Ingredients:
- 3 ounces dried soba noodles
- ½ teaspoon toasted sesame oil
- 2 tablespoons olive oil, or neutral oil of choice, divided
- ½ pound extra firm tofu, drained, pressed, and cut into ½-inch cubes
- 2 garlic cloves, minced
- 1 teaspoon freshly grated ginger
- 2 scallions, chopped, white and green parts separated
- 6 cups water
- 2 medium carrots, cut into matchsticks
- ¼ cup white miso paste
- 2-4 tablespoons soy sauce, to taste
- 4 cups sliced fresh spinach or baby spinach
Directions
At Home Prep:
- Prep carrots, scallions, garlic and ginger. Put white parts of scallion, garlic and ginger into one container, carrots in another and green parts of scallion in another.
- Put white miso paste in a small reusable container or bag.
- I like to put the sesame oil and olive oil in their own small containers. You can bring small to-go packets of soy sauce or just put soy sauce (we use Braggs amino acids) in their own container as well. (MSR kitchen sets come with those handy squeeze bottles…)
- Press your tofu and divide it up prior to taking it with you to camp. Place in a small container.
In Camp:
- Bring a medium pot of water to a boil. Add the soba noodles and cook them according to their directions. Then drain the noodles and discard the water.
- Return the noodles to the pot and toss them with the sesame oil. And cover with a lid and set aside.
- Coat the bottom of a medium skillet (or large nonstick pot) with 1 tablespoon of oil and place it over medium heat.
- When the oil is hot, add the tofu in an even layer and cook it for 5-8 minutes, flipping once or twice to achieve browning on multiple sides. (I don’t get too crazy here with the browning process).
- Remove the tofu from the skillet and transfer to the pot with the soba noodles.
- Heat the remaining tablespoon of oil in a large pot over medium heat. When the oil is hot, add the garlic, ginger, and white parts of the scallions.
- Sauté the mixture for about 1 minute, or until very fragrant.
- Add the water to the pot. Raise the heat and bring it to a boil.
- Add the carrots and simmer for about two minutes, until the carrots become bright orange and slightly tender.
- Remove the pot from heat.
- Place the miso into a small cup or bowl and ladle in a bit of the hot liquid from the pot. Whisk until the mixture is smooth.
- Stir the miso mixture into the pot, along with the spinach. Stir until the spinach is wilted. Season the soup with soy sauce to taste.
- Divide the noodles and tofu among four bowls, then ladle the soup over top and sprinkle the green parts of the scallions. Serve.
Trail Corn Chowder
Ashley Brown – Senior Copywriter
“I hiked the Pacific Crest Trail in 2015 and I knew I wanted to make most of my own meals, both for taste and nutrition. This corn chowder was a sleeper hit, both tasty and filling. I have a dehydrator and made a lot of my own dried ingredients (though freeze-dried corn is, in my opinion, much better than home-dehydrated corn), but you can everything for this recipe from the grocery store, no dehydrator needed.”
Servings: 2
Favorite Stove: MSR PocketRocket® Deluxe + LowDown Remote Stove Adapter if cooking for more than two people (check out what this rad little stove accessory can do for you)
Ingredients:
- 1 cup instant potato flakes, plain or flavor of your choice
- ½ cup powdered milk, ideally Nido whole milk powder
- 1 cup freeze-dried corn, I like Karen’s Naturals Simply Corn
- 1 tbsp dried chives
- 1 Tbsp dried minced onion OR ½ tsp onion powder
- 1 tsp dried parsley
- ½ tsp dried thyme
- ½ tsp granulated garlic powder
- Dash of celery seed, optional
- Black pepper to taste
- 1 chicken or veggie bouillon cube OR ¾ tsp salt
- Optional: Cheddar cheese, fresh or freeze-dried (yes it’s a thing, they taste like Cheez-its and melt in soup!)
Optional Add-Ins:
- Salmon in a pouch (add ½ tsp Old Bay to soup mix)
- Shelf-stable bacon bits
- Extra freeze-dried veggies
Directions
At Home Prep:
Mix all ingredients except cheese in a gallon freezer bag or two 1-quart freezer bags. Keep cheese in a separate bag.
In Camp:
Stove Method:
- Bring 3 cups of water to a boil.
- Add soup mix, stir well and turn heat down.
- Simmer for a few minutes then turn off the heat until thickened.
- Top with cheese and enjoy!
Freezer Bag Method:
- Bring 3 cups of water to a boil (or 1.5 cups if using a smaller pot and preparing each serving separately).
- Carefully pour 3 cups into gallon bag or 1.5 cups into each quart bag.
- Place in a bag koozie, stir well, and let sit for 10 minutes or until corn is fully rehydrated.
- Top with cheese and enjoy!
Want more recipes? We got ’em:
- Vegetarian Camp Meals Everyone Will Love
- Real Food for Mountaineering
- Adventure Grub: 8 Easy Camping Meals for the Family
- Homemade Backpacking Meals: Just Add Water
 Ashley Brown