YouTube Tips: MSR Stove Pump Maintenance
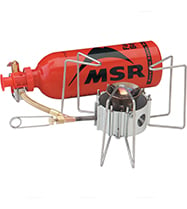
If you have a liquid fuel stove like the MSR DragonFly, it is important to do annual pump maintenance. This video describes the techniques, tools, and knowledge used to make sure your pump is working safely and efficiently. Learn how to fix cracks, leaks, corrosion, loose seals and low pressure at home, and enjoy your hassle-free cooking in camp.
All MSR liquid fuel stoves use a pump to pressurize their fuel. It is important to annually maintain your MSR stove and pump to ensure safe and efficient performance.
The maintenance described in the video above is for servicing the pump on any MSR liquid fuel stove, including previous generations of the pump. New generation pumps work with old generation stoves. If the plastic body of your pump has become cracked, burnt or damaged then it is beyond servicing. Please contact your local MSR dealer to purchase a replacement pump.
MSR Stove Maintenance Kits
There are two types of maintenance kits available for MSR stoves and pumps:
The Annual Maintenance Kit includes a selection of o-rings and the MSR tool required to perform most pump maintenance and some basic stove maintenance on any MSR stove.
Expedition Service Kits are stove-specific and provide all the replaceable parts and tools required for a complete service of the stove and pump. Most pump maintenance can be done using the annual maintenance kit, however, to complete all the maintenance described in the video above you will need the expedition service kit.
It is important every time before using your stove to check that there are no leaks. If there are any leaks, immediately replace the seals and o-rings before igniting the stove. It is advised that you conduct maintenance on your pump before taking it into the field. A PDF of your stove’s maintenance and operating instructions can be downloaded from MSRgear.com.
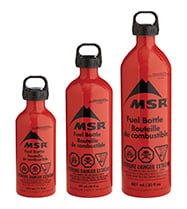
Step 1: Inspect the Fuel Bottle Seal
To perform maintenance on your pump start by checking the fuel bottle seal for any corrosion, dryness or cracking. If the seal is damaged in any way, replace it immediately.
If you are unsure whether the seal needs to be replaced, remove the seal and check it thoroughly.
- To remove: push down with your thumbs and slide the seal off the pump assembly.
- Inspect the seal for any signs of wear or damage.
- To reattach, slide the pump seal onto the pump so the molded seal faces away from the bottle.
- Push and screw the pump seal until the seal is fitted.
- Check to ensure the vent holes are visible; this indicates a correct fit.
Step 2: Inspect the Pump Cup
If you have trouble pressurizing the bottle, check the pump cup. To do this you will need to remove the plunger:
- Pull the plunger out to expose the text marked “Open here.”
- Now rotate the plunger a quarter turn to the left and pull it out completely.
- If the pump cup is cracked or damaged, replace it with one from the expedition service kit.
- If the pump cup is dry, simply apply some pump cup oil to lubricate it.
- If the pump cup is dry, cracked or damaged, you should also service the check valve. When the check valve is not sealing properly fuel leaks into the pump cup cylinder, which dries out the pump cup.
- When working correctly you should hear the check valve open as you pump.
Step 3: Inspect the Check Valve
To service the check valve, use the MSR tool:
- Unscrew the check valve and inspect the seal. If the seal is dry or cracked, then replace it with one from the service kit.
- On older MSR pumps the check valve seal may be a ball or the assembly may have a flat end.
- On current pumps the check valve has a ball seal fitted to a spring and screw.
- For current pumps, replace the entire assembly.
- For older models, replace the seal spring or screw.
- If you have the old flat-shaped seal, replace the entire assembly with the new ball and assembly.
Step 4: Inspect the Fuel Tube Bushing
While you have the plunger out of the pump cup cylinder you should check the fuel tube bushing for any corrosion, dryness or cracking. Replace the o-ring if it is damaged in any way.
- Apply some pump cup oil to the new o-ring to lubricate it before replacing the bushing.
- Once the fuel tube bushing has been refitted, replace the pump shaft by lining the bushing up with the shaft and locking it in place.
- If your pump is pressurizing the fuel bottle well, but the flow of fuel is compromised, the pump’s fuel filter may need replacement.
- Check if the fuel filter is dirty. Use a sharp tug to remove it from the pump, then replace the filter by reinserting a new one from the service kit.
It is best to run your MSR stove on white gas, kerosene or jet fuel, depending on your stove type. Although some models can be run on auto gas, the additives in auto gas are hard on your stove. If you must use auto gas it is best to use low grade fuel as premium gas has more additives.
Step 5: Inspect the Control Valve
To complete your pump servicing check the control valve o-ring:
- Remove the control valve and unscrew the stop nut using the MSR tool. Remember to do a few turns of each alternating.
- Check that the o-ring is not damaged. You are looking for any nicks or wear and tear.
- If the o-ring is in good condition you can reuse it.
- If the o-ring is damaged, remove it using a safety pin and replace it with one from the service kit.
- Reassemble the control valve and apply a drop of pump cup oil to the o-ring.
- If you have a DragonFly stove, note that the pump’s control valve is slightly different and there is an additional step to this process. The control valve has two o-rings; check both o-rings and replace if necessary.
- To reassemble the stop nut, screw it back in and use the MSR tool to give it a 1/16 turn to gently tighten it.
It is important to note that the red color on some MSR pump o-rings is just a Teflon coating used for identification, which can come off if you touch the o-ring. This is not an indication that the o-ring needs replacement.
Related Posts: