Camp Recipes: Pot Pie Pockets
By Tara Alan
As much as I appreciate the ease and simplicity of ultralight grub for the trail, there’s nothing like having the time, space, and gear to spread out, make the camp kitchen my own, and concoct something a bit more elaborate. If you’re at basecamp and have a penchant for cooking projects, it’s time to bust out all the pots and pans you have and get wild.
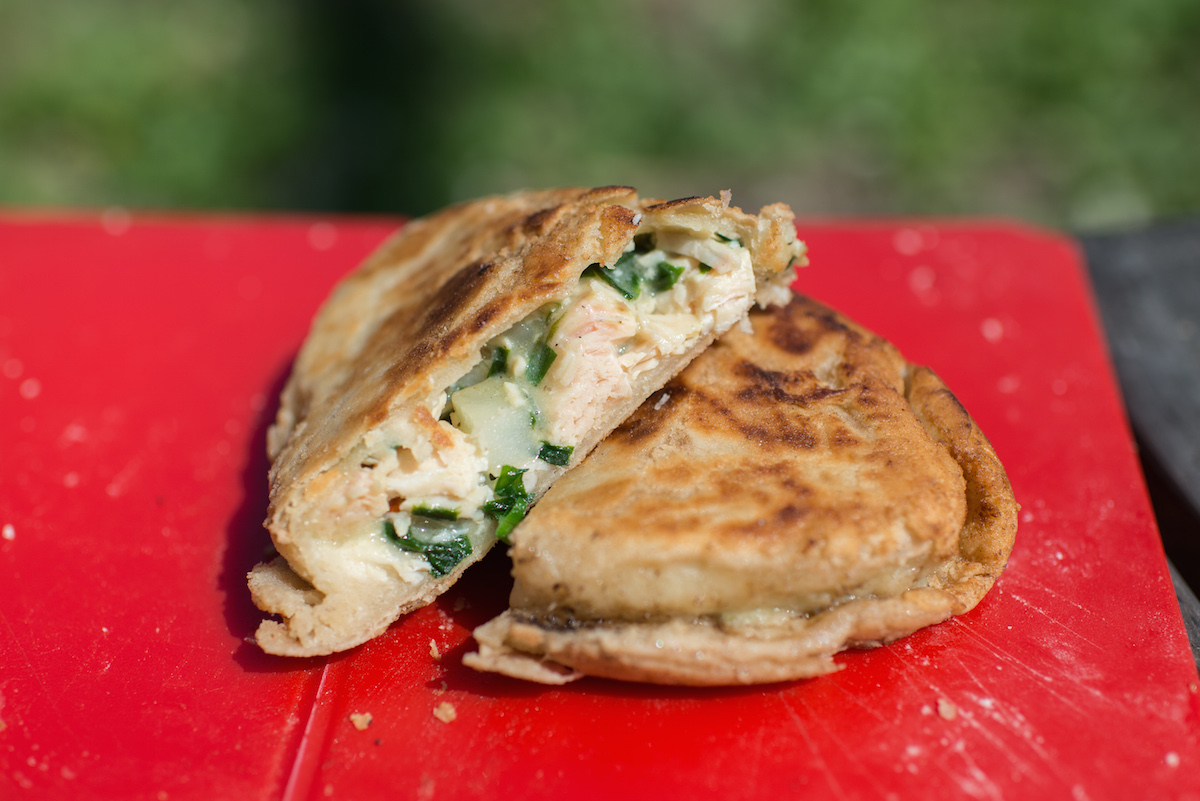
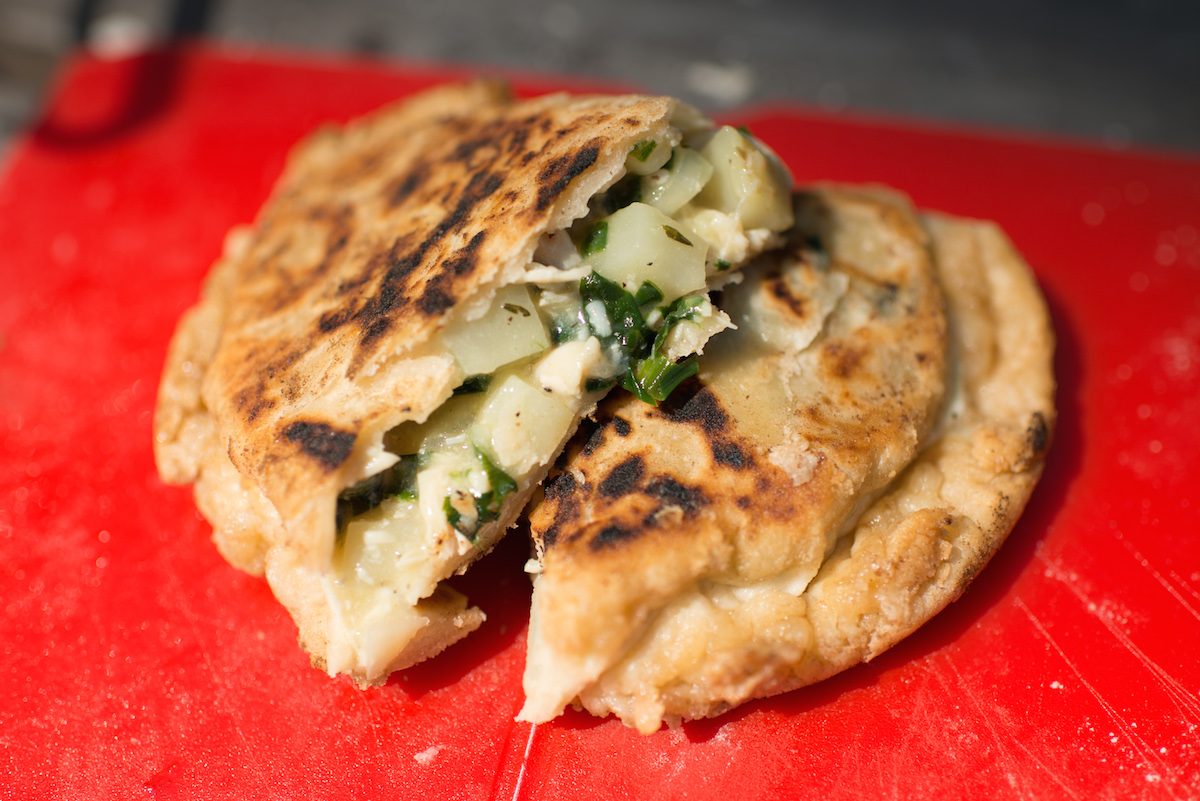
For today’s recipe, we have pot pie pockets: crescent-shaped pillows of crust filled with a fresh mix of chicken, sweet peas, wild ramps and creamy potatoes. The pockets are simple enough for camping food, and great for a frontcountry feast. The recipe makes two generous pot pies, plus some extra filling for munching.
A word about ramps:
Ramps are wild leeks that grow throughout the northeast. They’re oniony and fresh, and celebration-worthy because they’re one of the first fresh edibles of the year. In some parts of the world they’re endangered, however, so be sure you know what you’re doing when you decide to harvest them. You can also buy them at farmers’ markets in the spring.
If you can’t track down responsibly harvested wild ramps, not to worry. Use a small leek for this recipe instead! If you opt to go this route, make sure to slice it in half lengthwise and wash well between the layers. Otherwise, you’ll be in for a sandy surprise. Cut the leek into narrow crescents. Use the white and bright green parts, but don’t bother with the tougher, dark green end. Sauté with the potatoes and proceed with the recipe.
A word about crust:
I love making crusts at camp. The toasted smell of them turns heads and makes fellow campers jealous. If only they knew how easy they are to make! Yes, they dirty a few more dishes than I’d use otherwise, but when I have time to spare and easy access to ample water, I’d say they’re worth the extra effort.
The crust for these pockets is delicious, but it’s also a little delicate. My usual flour-water-salt dough has less flavor, but is a little more forgiving. If you’re a novice cook and would feel more comfortable with a less fussy dough, use 1 cup flour, about 8 tablespoons water, and ½ teaspoon salt. Mix everything together, and then squish the ball with your hands to form a uniform dough. Roll it out as the recipe indicates.
OK, now that that’s out of the way, let’s get cooking!
Pot Pie Filling Ingredients:
- 2 medium potatoes
- 1 small bunch sustainably harvested ramps (about 5-8 wild leeks), or 1 small leek
- 2 tablespoons butter
- 1/4 teaspoon salt
- 1⁄2 teaspoon ground black pepper
- ¼ teaspoon thyme
- ¼ teaspoon onion powder
- 2 tablespoons flour
- 1¼ cup water
- 2 bouillon cubes
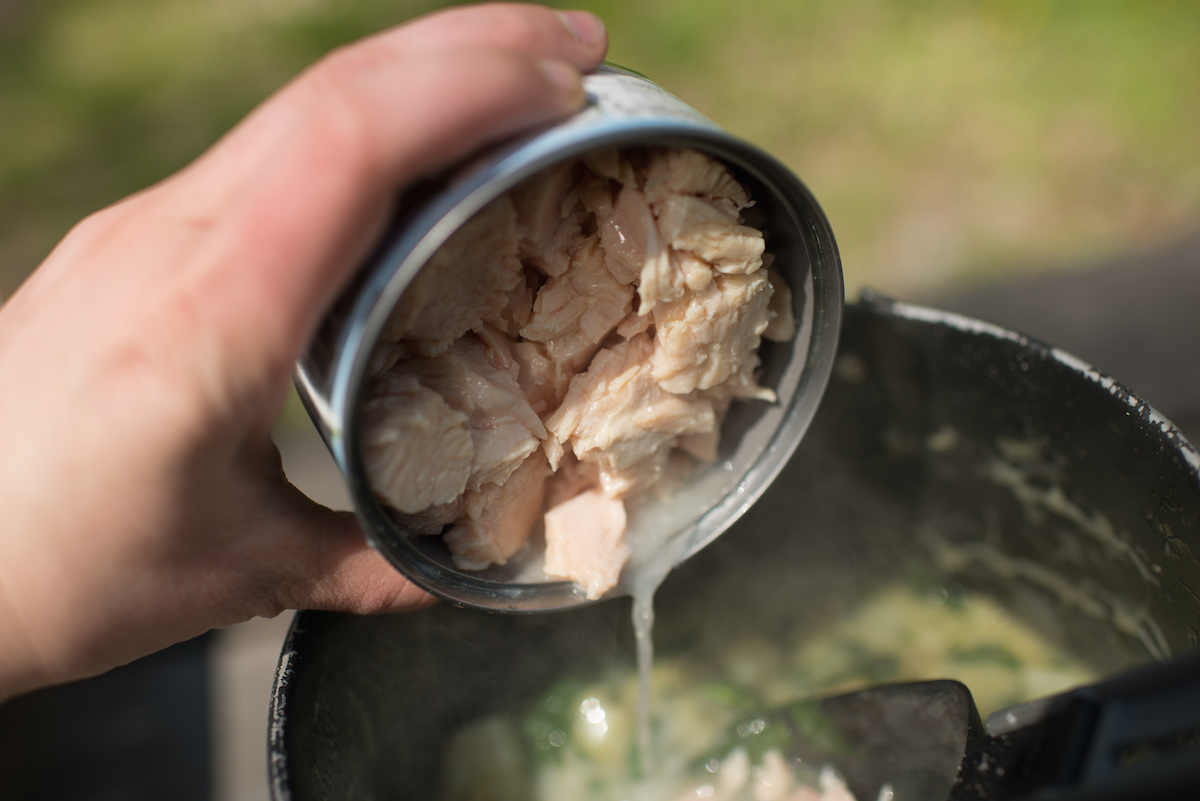
- 1 10-ounce can of chicken breast in broth
Dough Ingredients:
- 1 cup plus 2 tablespoons flour
- 1/2 teaspoon salt
- 4 tablespoons very soft butter (for the dough)
- 4 tablespoons water (you may need a tiny bit more, depending on the humidity)
- 1 tablespoon of butter (for frying)
First, prepare your filling ingredients: clean the potatoes and ramps (or leek).
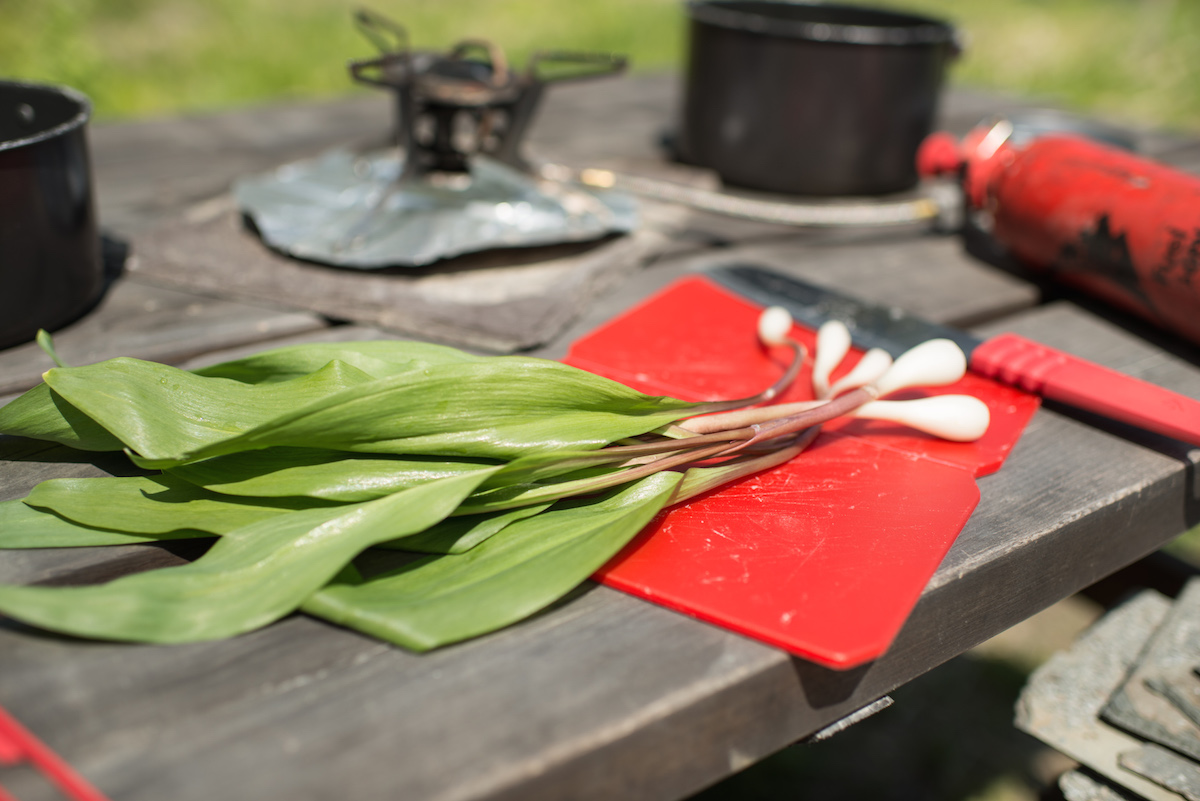
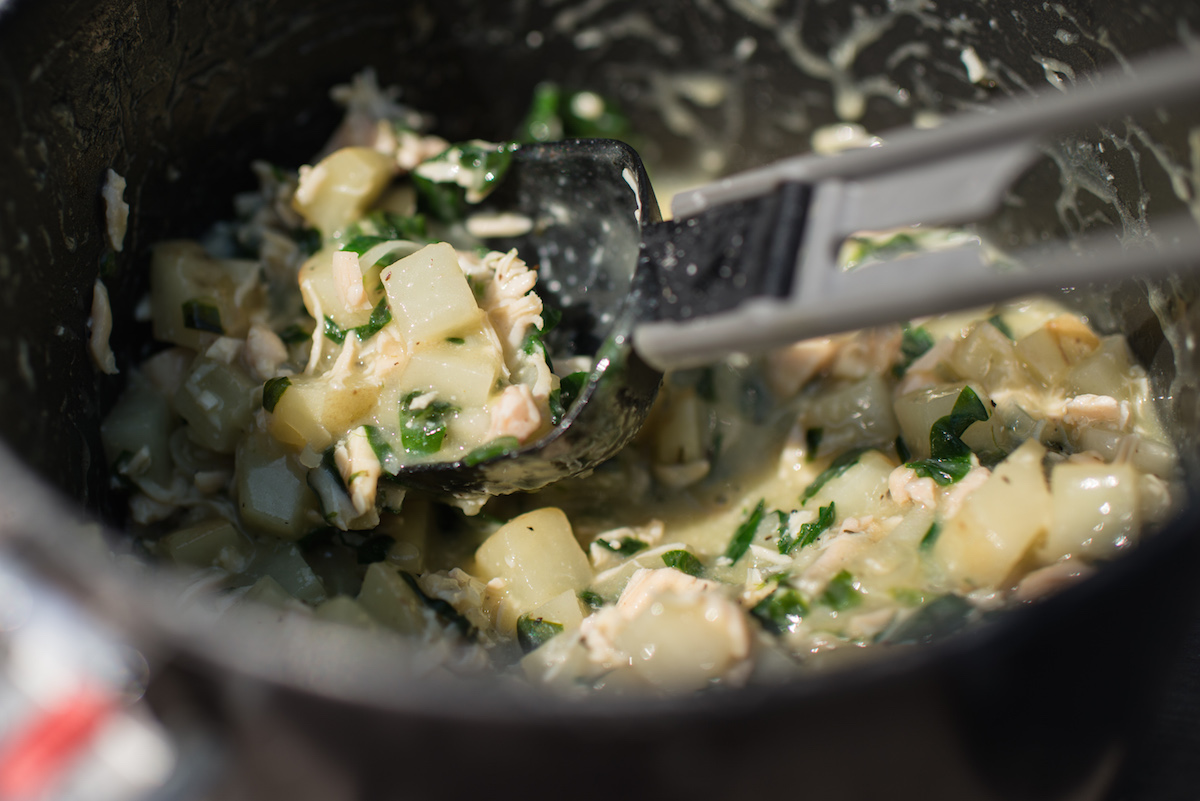
Then, chop the potatoes into diminutive chunks. Cut the bulbs of the ramps into thin rounds, and the leaves into ribbons. Discard the tough stems. Add the vegetables to a large nonstick cooking pot like the 2.5 liter pot in MSR’s Base 2 pot set along with the butter, salt, pepper, thyme, and onion powder.

Measure 2 tablespoons of flour into a small cup, and set it aside. Measure the water into a mug or bowl, and set it aside as well. Get out the bouillon cubes. Open the can of chicken, and drain it of most of its liquid.
Now, get cooking: prime and light your stove, and turn it to a medium heat. Sauté the vegetables for a few minutes, stirring to make sure nothing sticks. Next, add in the flour, and stir for another minute. Add the water in thirds, stirring to incorporate it between each addition. Toss in the bouillon cubes. Keep cooking, stirring, until the potatoes are soft, the bouillon cubes are dissolved, and the stew is thick and creamy. Finally, add the chicken, and gently mix it in.
Let the pot pie filling cool down while you prepare the dough:
In your small non-stick cooking pot (like the 1.5 liter pot from the Base 2 set), measure the flour and salt and stir to combine. Then, add the soft butter.
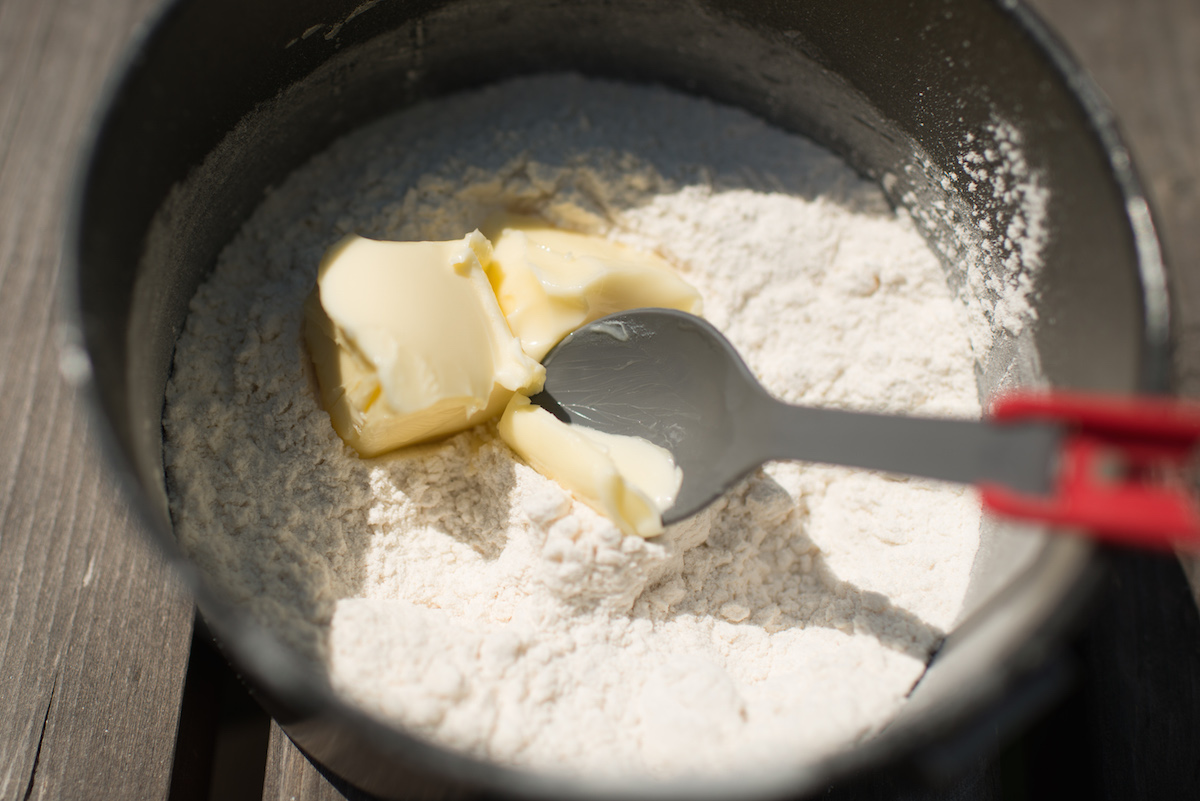
Mix it in until the flour looks crumbly.
Finally, add the water and mix until you’re able to combine everything into a ball of dough.
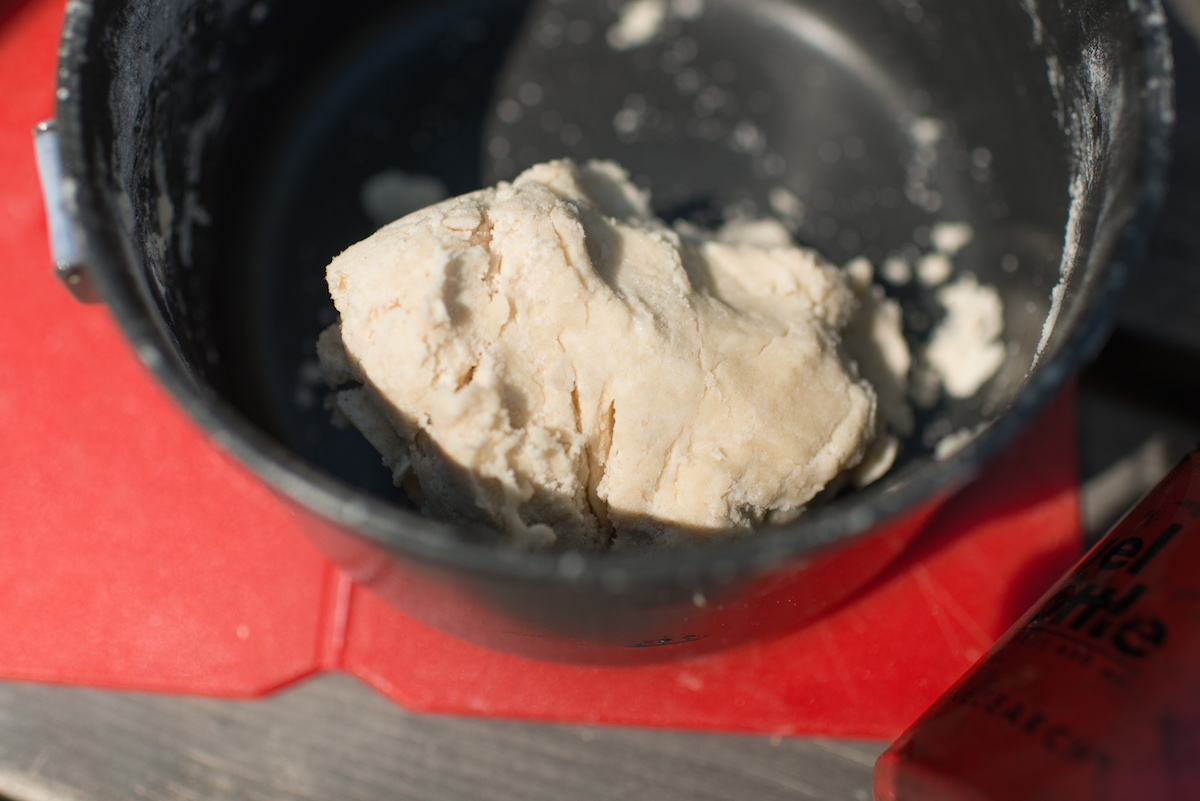
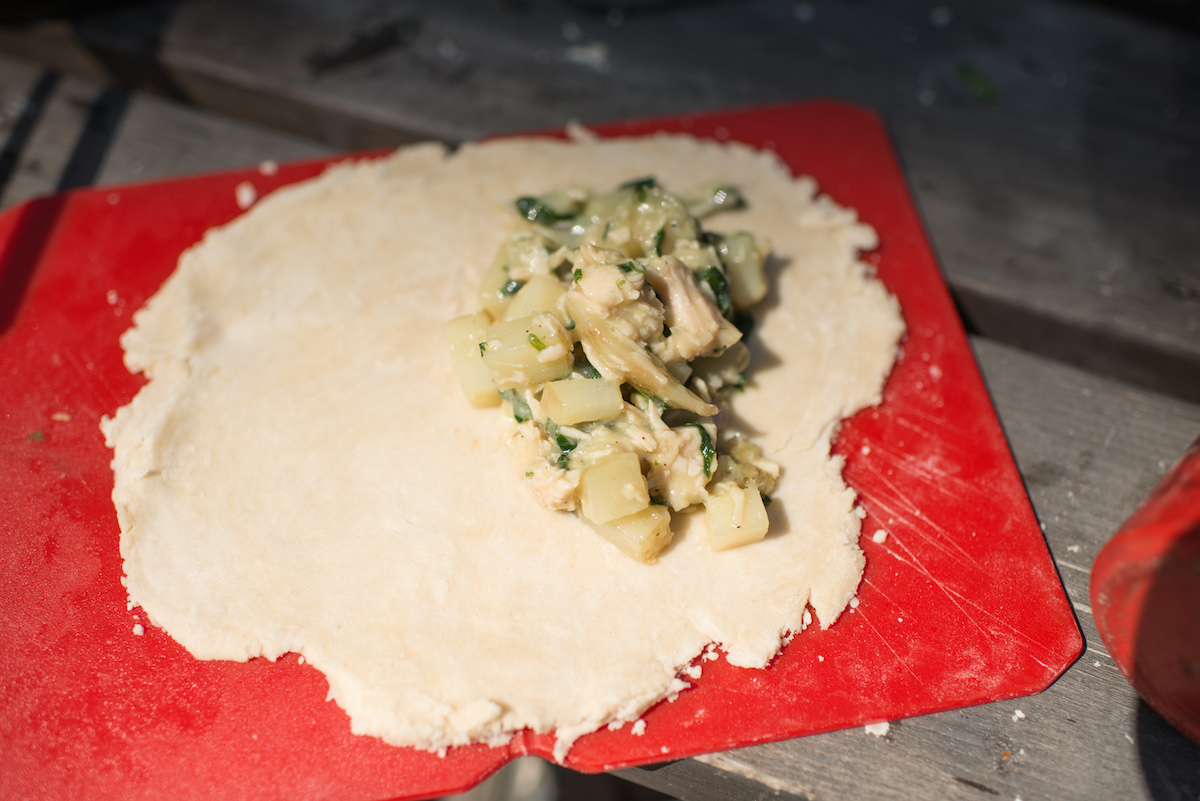
Break the ball into two sections, rolling each into a ball. Sprinkle a tiny bit of flour onto a cutting board or plate, and place one dough ball on it. Flatten it with your fingers, then take a water bottle (or whatever you can find) to it, rolling until it is round, very thin, and the diameter of your skillet.
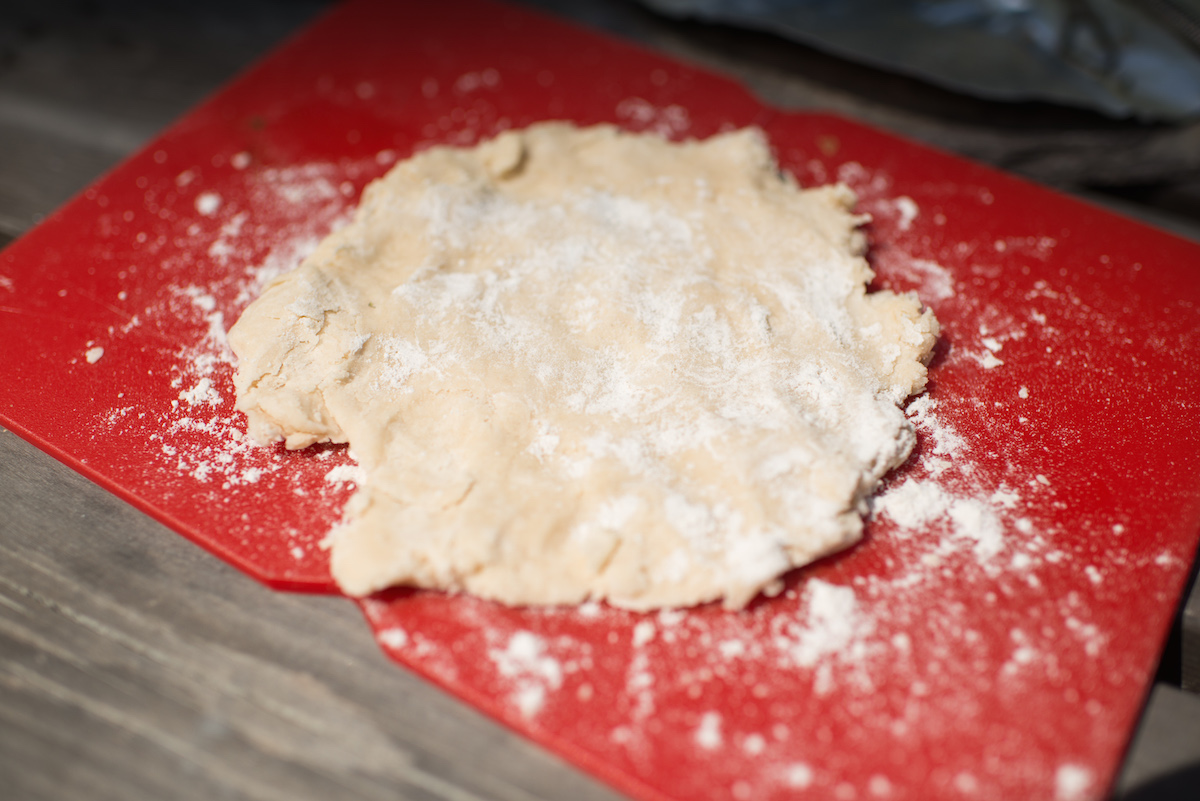
If you develop any tears or holes, don’t worry. Just grab a bit of thick dough from somewhere else and smoosh it over the hole, using a bit of water as glue.
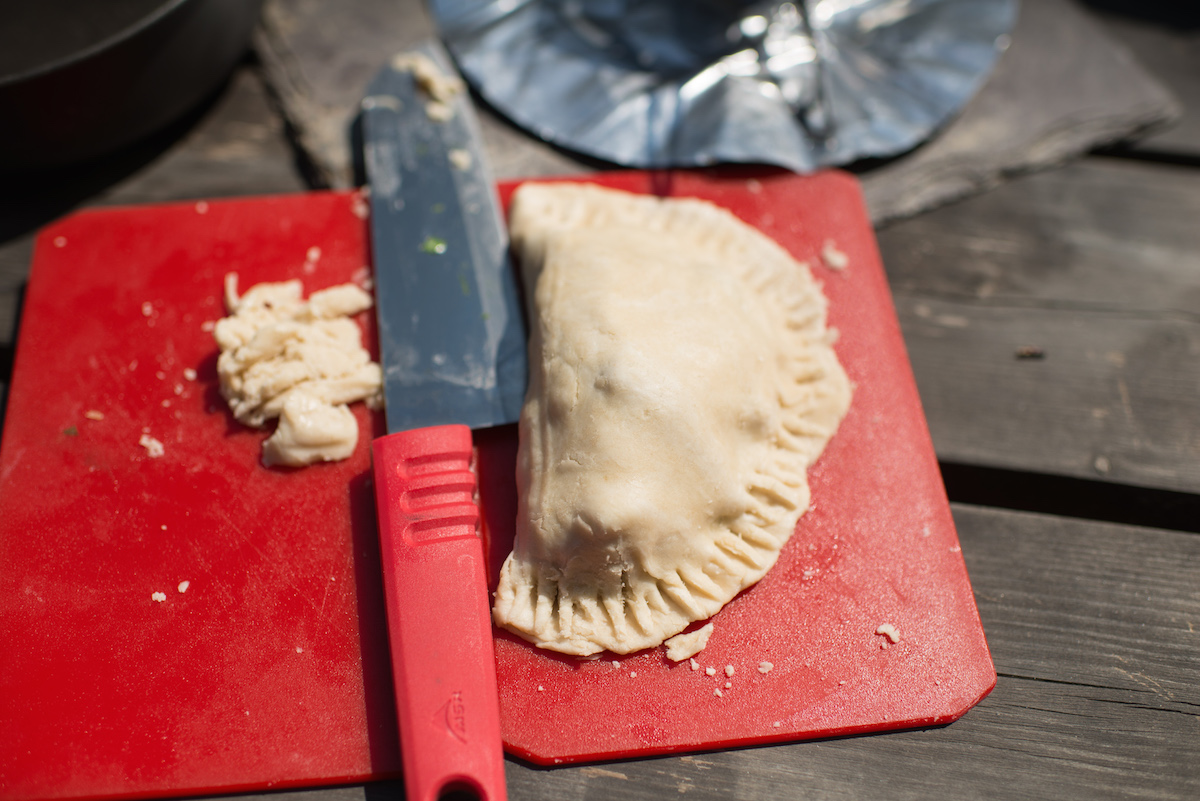
Now, add about a half cup of chicken and potato mixture (a slightly heaped scoop from an MSR Alpine Spoon) to one half of the dough, making sure you leave at least a ½” border without filling. Dab the empty perimeter of the dough with a touch of water (this will act as glue), and fold the empty half over the loaded half, easing it over the filling, creating a half-moon shape. Seal the edge by pressing it with the tines of your spork, or by pinching it closed with your fingers.
Pot Pie Tip: Do not put more than ½ cup of filling in each pocket. If you have leftover filling, eat it as-is. If you have leftover dough, fry it up in butter after you’re done with dinner, sprinkle it with cinnamon sugar, and enjoy!
Now it’s time to fry: add one teaspoon of butter into a frying pan. Prime and light your stove, and turn it down to a low setting. Hold the pan over the flame to heat. Carefully place your pot pie pocket into the melted butter. Fry it on one side until it’s golden underneath. Then, carefully flip it over with your Alpine Spatula.
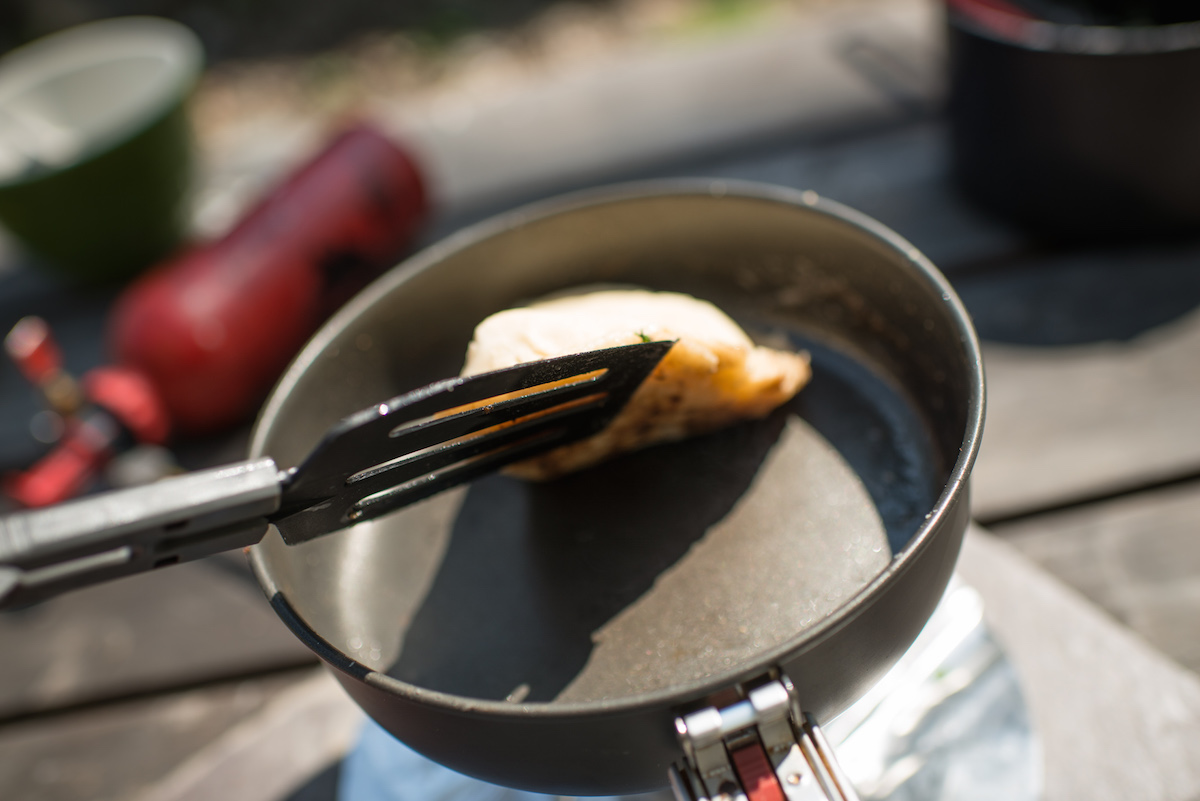
MSR WhisperLite Tip: As you’re frying, hold the pan above the flame, adjusting the distance from the stove when you want more or less heat. This way, you’ll have more temperature control, and won’t inadvertently scorch your pot pie.
After the top and bottom of the pie are cooked and golden, inspect the edges. The seam and the fold are the thickest, doughiest parts, so move the pan around over the flame to make sure each area gets cooked.
 When all parts of the pot pie are browned, remove it to a plate. Make one more pot pie pocket the same way you made the first. Let cool slightly, and enjoy!