Best Camping Knot: How to Tie the Taut-Line Hitch Knot
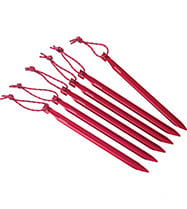
Whether you’re guying-out a tent, hanging a bear bag or tying a load to your pack, the Taut-Line Hitch is one of the handiest all-purpose knots for backpackers and campers. It’s so easy and versatile, we’ve wondered, “Why doesn’t every single outdoorsy person know and love this knot?”
Once set, the Taut-Line, a rolling hitch knot, can be adjusted to increase or slacken tension on an anchored line, and it holds fast and secure under load. Even astronauts on the space shuttle Discovery used this knot on their repair missions to Hubble Space Telescope.
Here are the four easy steps that will make you a pro at using the Taut-Line Hitch knot the backcountry:
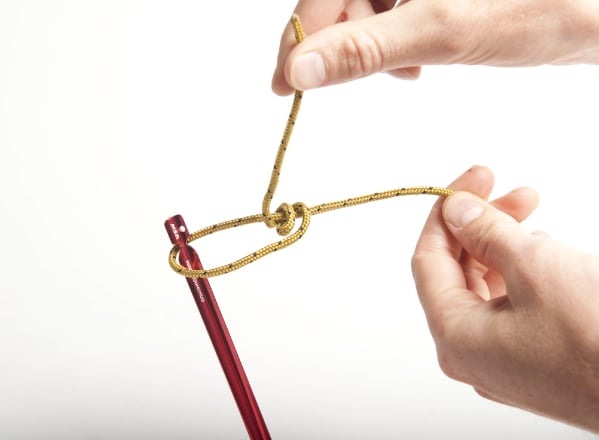
Step 1: Anchor and Coil
Pass the rope around an anchor point, and run the rope’s free end parallel to its standing line. Coil the free end around the standing line twice, each time looping back toward the anchor.
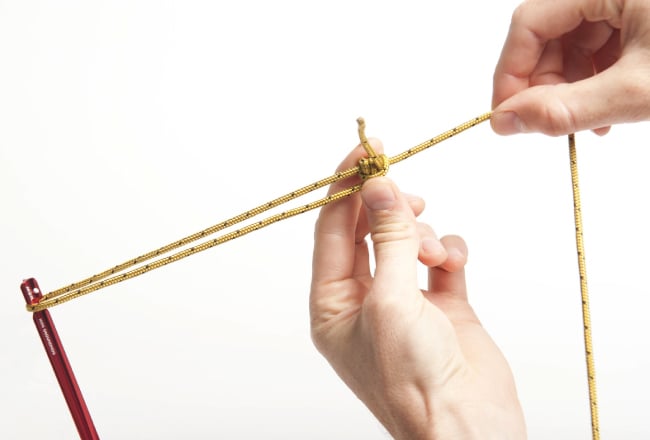
Step 2: Far-side Coil
Make a third coil around the standing line this time on the far side of the two coils just made. Loop it toward the anchor, threading the free end between the first coils and this third one.
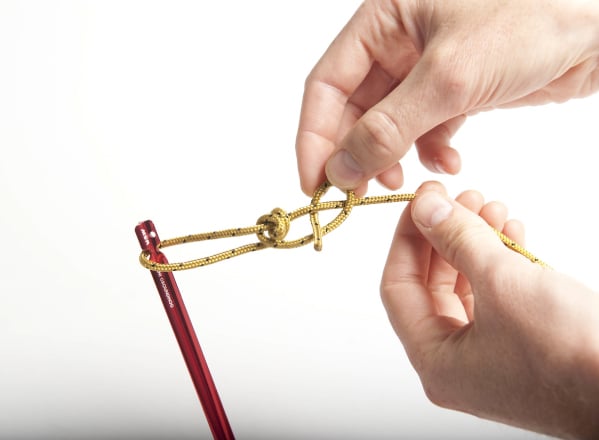
Step 3: Tighten
Dress the knot, removing any kinks or twists of the rope. Then pull the free end to fully tighten and secure it.
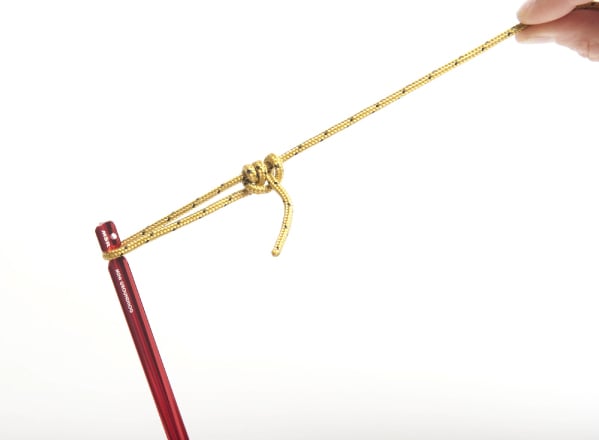
Step 4: Adjust Tension
Slide the knot to tighten or loosen the standing line. To tighten the line, slide the hitch away from the anchor point, enlarging the loop. To loosen it, slide the hitch toward anchor point, creating slack in the standing line.
And that’s it! Let us know in the comments if you agree, or if you think there’s an even better knot everyone should know.
Related Posts:
- [VIDEO] How to Avoid Tent Condensation
- Tent Care Tips – Make Your Tent Last Longer
- How to Pack a Backpack – Backpacking Tips
Updated. Originally Published July 23rd, 2014.