Behind the Photo: Photographing the Milky Way
Originally Published on May 14th, 2014
By Jameson Savage
I vividly remember lying on the wet grass staring up at the Milky Way passing over Yellow Stone National Park as a child. I had never seen anything so thought-provoking or awe-inspiring before in my life, and I can’t safely say I’ve seen anything that compares to it since. This is an experience that I wouldn’t want anyone robbed of, but as our cities expand we lose our connection to the stars ever so gradually. The larger they grow the smaller our view into the universe becomes.
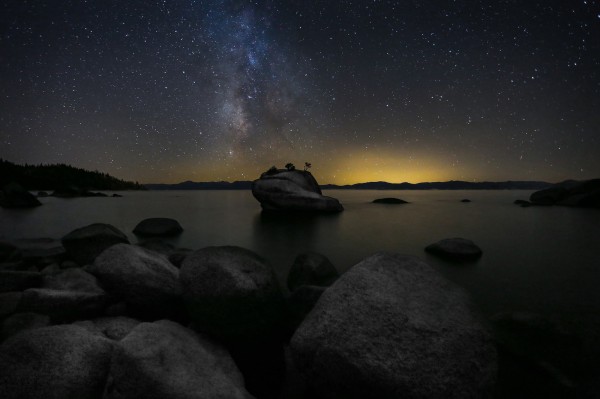
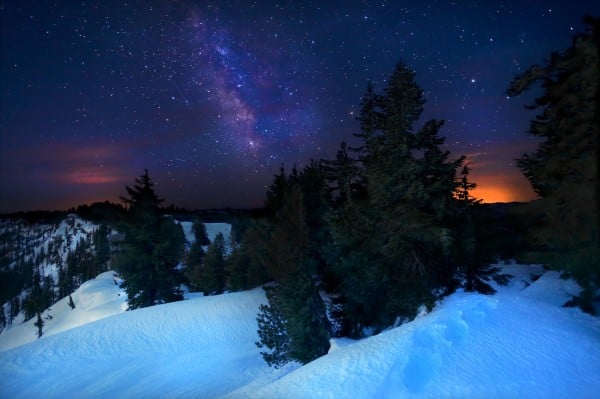
Over the course of the next five months I’m setting out to capture the Milky Way throughout the Western United States documenting the impact that our cities have on it’s visibility, and what we can do to curb this effect. I’d like to share the experience of this project with you by running through the planning and gear that you will need to capture Milky Way images such as these taken at Lake Tahoe, Nevada, and Crater Lake, Oregon.
Preparation:
One of the first steps in finding your ideal location is simply pulling up a map. Obviously, the further from major light sources that you are the better. With less light pollution you’ll be able to get a much clearer view of the night sky. You can use Google to find a dark-sky map to help you find your ideal location.
The Milky Way is only highly visible in the northern hemisphere during February to around September.
Take into consideration which phase the moon currently is in. During a full moon you won’t be able to capture any of the Milky Way due to the reflective sun light washing out the night sky. There are multi-day periods in which it’s prime to shoot. These periods begin during the waning crescent. During the waning crescent, you will still get some reflected light but it won’t completely wash out out the night sky. Some people prefer this for certain shots since it is a great way to equally light a scene without exposing the scene with a flashlight or headlamp.
Next, I would download an app such as Star Walk™. It’s a simple-to-use, real-time vision of the night sky and its constellations. The purpose of this is to let you know where in the sky the Milky Way will be and at what time. If you don’t have a smartphone you should be able to use a map and a compass to find out your location and Google what the positioning will be beforehand.
Getting a clear shot of the Milky Way is the opposite of storm chasing, something which is often associated with landscape photography. It’s the only time that I seek out completely clear skies and make sure to check days in advance to line up these breaks in the weather with the lunar cycle.
I cannot stress over-preparing enough. There have been multiple times where I’ve found myself in a rush to get to a location only to find out I don’t have an essential piece to my rig. Don’t find yourself in a situation like this. Make a list, check it twice.
Gear:
A sturdy tripod and head. Your camera has to remain motionless for up to 30 seconds or so, and any small movement will show in those 30 seconds.
An Intervalometer can go a long way when you activate you shutter release so you don’t shake the camera. Although it’s not absolutely necessary, I highly suggest one.
A headlamp that you trust to help you navigate the trails, brush, or whatever else is going to come your way on your trek.
Make sure to be prepared with extra batteries. Batteries tend to drain quickly when they’re cold. This doesn’t only apply to camera gear; make sure that you have back ups for your headlamp or flashlight for your journey back.
Wear layers. There’s nothing worse than making it to a location and realizing you’re under dressed.
Camera Instructions:
You’re going to want to use a fairly wide angle lens. I shoot my landscapes on 17-40mm and 24mm lenses, which allow me to capture the foreground, giving the night sky scale, rather than isolating it.
A low f stop helps with capturing light and adding definition to the stars. The wider that f stop, the less you’ll need to compensate with exposure time. Any exposure time past 30 seconds could cause star trailing due to the Earth’s rotation. The lowest f stop I would shoot the stars at is f4; but if you can go higher I most definitely would.
Set your iso to somewhere around 1600. This is my go-to when first figuring out what my settings should be in the situation. On a lot of cameras you will get a lot of visible noise (grain) at higher iso’s. Feel free to go past my suggestion; just know that noise is something you will begin to encounter.
Your camera body is a determining factor in how much noise you will actually receive from iso. Before heading out, I would do a quick Google search to see what is ideal for your setup.
It takes a pretty obsessive attitude to haul your gear out to these locations at the right times. The pay off in the end is that you’re able to take home something that is symbolic of all that work you put into it. A monument to the drive, insomnia, planning and experience.